Introduction for service planners
Service planners make sure everything is in the order of service! They collaborate with other team leaders to add announcements, worship, message elements, and team members to ensure the service runs the way it's intended. This overview will help you become familiar with some features of Services that will help you streamline your process.
Tip
If you cannot log in, follow the steps in the Log in to Planning Center article.
Organize account
Every church has their own way of planning services. Before you dive into a plan to add your order of service, think through how you want to organize those plans. Service types hold all the plans in one place. Here are some ideas to get you started:
Important
If you're the first administrator, you can set up your account by following the Getting started guide.
Are there multiple services happening? If so, they need their own plans. Create service types based on the services happening on campus:
Adult service
Elementary
Preschool
Young adult
Youth
Creating service types for each service helps you organize teams in the correct place and gives access to the right people.
Add order to plan
Once you have a service type and created a plan, add the order of service to ensure everyone scheduled to the plan knows what's going to be happening in service.
If your future services look similar to the one you're creating, export the plan as a template, so you can quickly import it to other plans in the future.
Want to watch a video before you get started? No problem! This seven-minute video covers how to add your order of service.
Songs
Songs are stored in your account to be used in any plan! You can add a new song from the plan or add songs to your song library one by one.
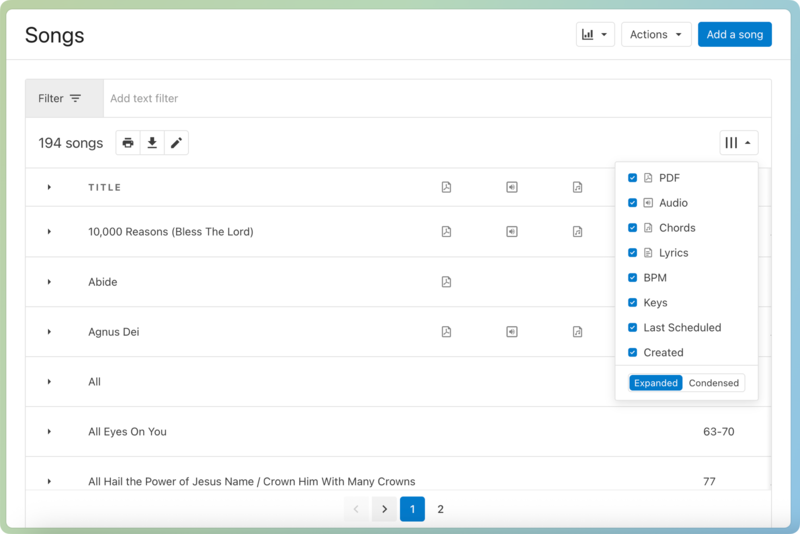
Select the Songs page from the top navigation in Services.
Select the arrow to the left of a song title to view the available arrangements.
Select the column button (three vertical lines) in the top right to change which columns are visible or change the view to Expanded or Condensed.
Team members
Add team members to the plan. If your times are assigned to the appropriate teams, you'll see any conflicts when you add them.
Tip
If you've never added team members to a plan, check out our scheduling guide!
Manage files and notes
If there's more information you want team members to know outside of what's already included in the plan, add a file or note.
Important
This section is not for media or song files that need to be used in service. Chord charts can be added to songs, and sermon slides can be added to media.
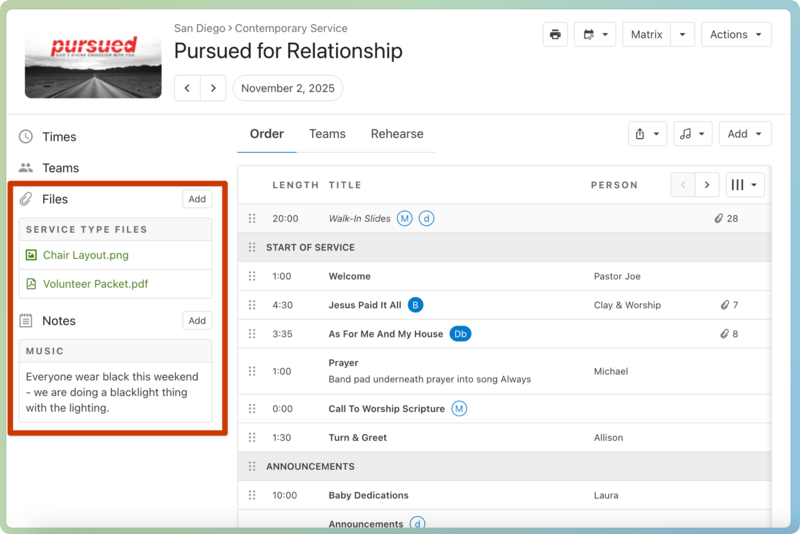
From a plan page, scroll down to the Files or Notes sections in the left sidebar. If these sections are hidden, select the section headers to expand them.
Files: Add specific files for people in the plan to access. You can also add files to the service type, which will appear in every plan in that service type.
Notes:Any notes are specific to the current plan. If there's information you want your teams to know or be reminded of when you plan, make a note!
Communicate plan information
You can communicate with the teams scheduled to the plan in different ways:
Send an initial scheduling email letting them know about the plan.
If any changes happen, send a text to everyone scheduled to the plan from the Android or iOS app.
On the day of the event, encourage team members to use Services LIVE to communicate during service.
Regardless of how you communicate, make sure you communicate clearly and often! Many team members may not have the same knowledge as Services like you do, so help them find the information they'll need!
Get help and support
Any time you have questions, Planning Center's support team is here to help! Use the ? question mark icon in the toolbar to open the Help and support sidebar.
From here you can:
Search online documentation for an instant answer to your question. The toolbar also suggests help articles based on the page you are currently viewing.
Access getting started resources or jump into Planning Center University (PCU). You can also connect with other Planning Center customers in the customer communities and see what's new by checking out the changelog.
Connect with a support agent for one-on-one help. You can email them directly from the toolbar, or schedule a phone call if you prefer.
Depending on which Planning Center product you're using, you can also contact support directly from the corresponding mobile app:
Services/People: Tap your profile icon in the top right, then tap Help to access help articles or open a ticket with support.
Check-Ins: Tap the ⚙️ settings icon in the bottom right, then tap Contact Support to open a ticket with support.
Music Stand: Tap the menu icon (three horizontal lines) in the top left, then tap Help to access help articles or open a ticket with support.
Organization administrator requests
The following Support requests can only be made by organization administrators:
Data removal or corrections you can't make yourself (undo old CSV imports, iCal imports, etc)
Gain access to anything that was created and managed by someone else in the account
Restore or fully delete a canceled account
Request access to Giving (if there are currently no Giving administrators in the account)