Use plan notes for team information
Use plan notes to communicate information that applies to the whole plan or to a specific team, such as sermon notes that not everyone needs to see.
If you assign a plan note to a specific team, scheduled team members will see the plan note in any reminder emails they receive. You can also send the plan note as a separate email to the scheduled members of the assigned teams. Plan notes are not included in scheduling emails.
When you create a plan note, you can choose from one of the service type's existing plan note categories. You can customize plan note categories for a service type on the service type's settings page.
Add plan notes
View plan notes
You can view plan notes on the web, mobile app, or in Church Center.
Send a plan note as an email
You can send a plan note as a separate email to the scheduled members of the assigned teams.
Important
You can only send a plan note as an email when using Services on a web browser.
Select the Plans page from the top navigation in Services.
If you have multiple folders, select the folder that contains the service type you're working with.
Select a plan from the service type you're working with.
Scroll down to the Notes section in the left sidebar. If the section is grayed out, select the Notes header to expand it.
(Optional) If you need to see a note that's assigned to a team you don't lead, select Show [number] note(s) for other team(s).
Select the plan note you'd like to send as an email.
Select Send... in the bottom right to send the note as an email to all scheduled team members from the assigned team(s).
Create a note from an email
When you email a group of people in a plan and add new text to the body of the email, you have the option to save the text as a note. If this new text is information you'd like your team to refer to later, save that info as a note where they can easily find it!
Important
You can only create a note from an email when using Services on a web browser.
Select the Plans page from the top navigation in Services.
If you have multiple folders, select the folder that contains the service type you're working with.
Select a plan from the service type you're working with.
Select the Teams tab.
Select the ✉️ email icon in the top right.
In the Recipients popup, choose who to include in the email.
Select Next.
Add custom text above the email's default body. Do not delete any of the existing text.
Select Send [number of people] in the bottom right.
In the popup, choose a category for your note, edit the text, and add assigned teams.
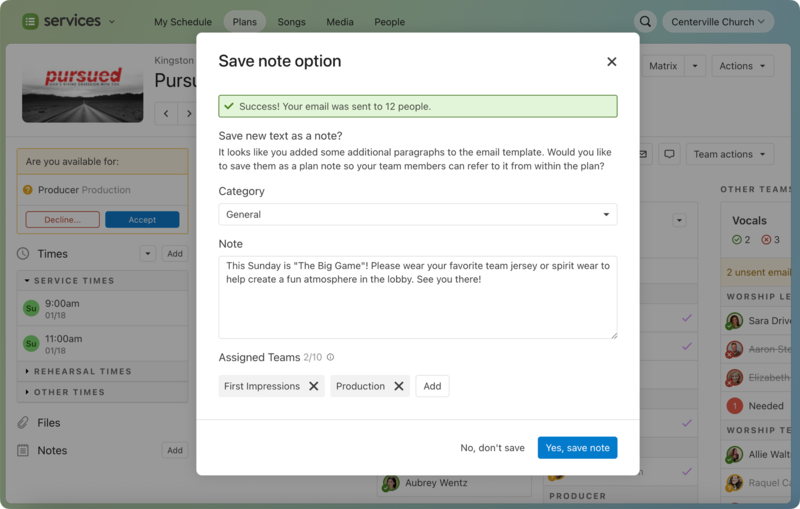
Select Yes, save note to add this note to the plan.