Introduction for administrators
Welcome to Services! This guide provides an overview of the main concepts to help you have a better understanding of how to set up your Services account.
Tip
If you cannot log in, follow the steps in the Log in to Planning Center article.
Want to watch a video before you get started? No problem! This six-minute video provides an overview of what you can do in Services on the web.
Create a service type and plan
Service types and plans organize information for any services or events happening at your church.
A service type contains related plans, which usually happen weekly. Service types also contain teams and templates related to its plans.
A plan is where you store all the details about a particular service. It can include service times, rehearsal times, the teams you've scheduled for that service, and all the items happening in that service.
When you create a new service type, you'll be guided through a wizard, which will also help you create the first plan for that service type.
Add songs and media
Any songs or media that you want to use in your plans must be first added to the songs library or the media library.
Set up the order of service
Set up your plan items and files.
Add songs, media, and other plan items in the order they will occur in the service.
Add any additional files for the plan or service type.
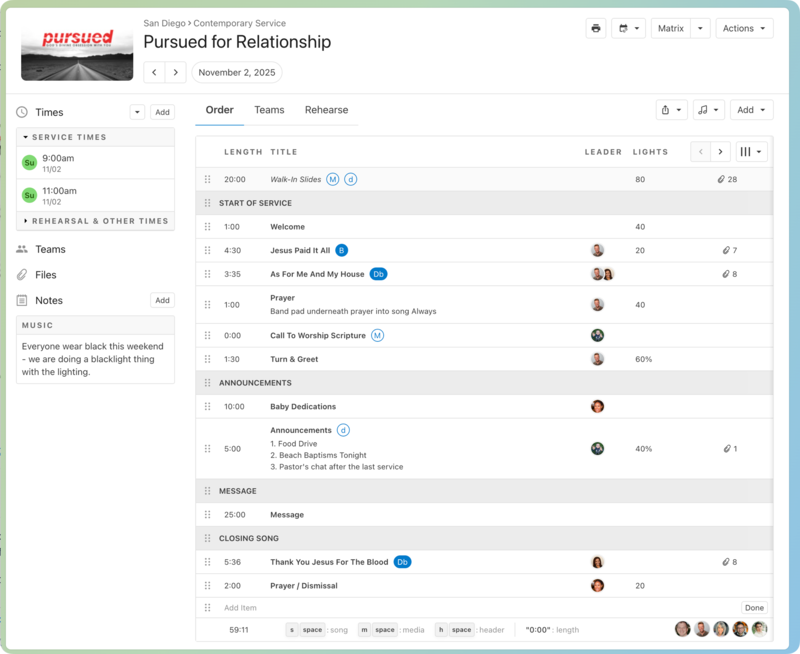
When you are finished adding all your items to the plan, it should look similar to the following example:
Add and schedule people
Add people to your Services database by importing a CSV file or adding them individually.
Important
CSV import is only available for organization administrators.
Once people are added, you can create teams and schedule people to plans. The Scheduling your teams article walks you through the most commonly used process for creating and scheduling teams.
After people are scheduled to teams and sent a prepared notification, they can log in and view the service, as well as accept or decline the invitation to serve.
Get help and support
Any time you have questions, Planning Center's support team is here to help! Use the ? question mark icon in the toolbar to open the Help and support sidebar.
From here you can:
Search online documentation for an instant answer to your question. The toolbar also suggests help articles based on the page you are currently viewing.
Access getting started resources or jump into Planning Center University (PCU). You can also connect with other Planning Center customers in the customer communities and see what's new by checking out the changelog.
Connect with a support agent for one-on-one help. You can email them directly from the toolbar, or schedule a phone call if you prefer.
Depending on which Planning Center product you're using, you can also contact support directly from the corresponding mobile app:
Services/People: Tap your profile icon in the top right, then tap Help to access help articles or open a ticket with support.
Check-Ins: Tap the ⚙️ settings icon in the bottom right, then tap Contact Support to open a ticket with support.
Music Stand: Tap the menu icon (three horizontal lines) in the top left, then tap Help to access help articles or open a ticket with support.
Organization administrator requests
The following Support requests can only be made by organization administrators:
Data removal or corrections you can't make yourself (undo old CSV imports, iCal imports, etc)
Gain access to anything that was created and managed by someone else in the account
Restore or fully delete a canceled account
Request access to Giving (if there are currently no Giving administrators in the account)