Introduction for managers
If you're in charge of a signup for your church, you can access its settings and attendees by logging in to Registrations.
Tip
If you cannot log in, follow the steps in the Log in to Planning Center article.
Settings
As a manager, you only have access to the signups you can manage. Select a signup to see its information.
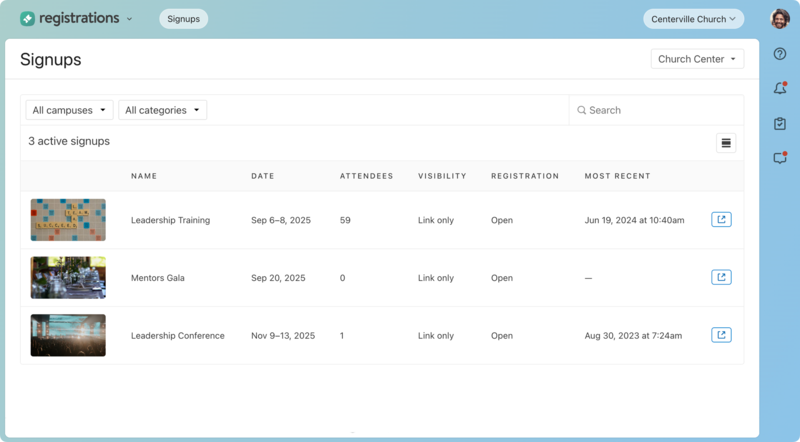
You can add as much information to your signup as you'd like. Here's a quick overview of each section under the Configuration tab and links to show you how to use them.
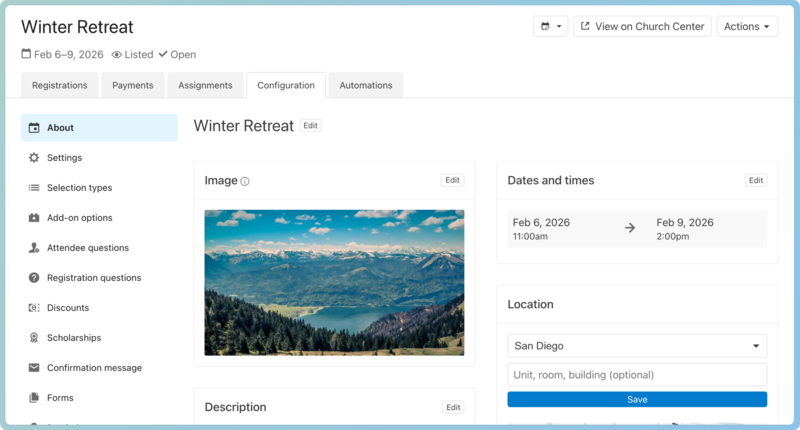
Enter the registration details, including dates, times, description, image, location, and other managers from the About tab.
From the Settings tab, choose how to show the signup on Church Center, and set it to automatically open and/or close, manage payment methods, manage registrant options, add a support contact, and add people as subscribers to notify them of new registrations through a daily digest email.
You added your first selection at setup, but you can change the name or add more from the Selection types tab.
If you have any options or merchandise you want people to add to their registration, put those options in the Add-on options tab.
To gather information about group preferences, add custom registration questions.
To gather information about individual preferences, add custom attendee questions.
Create discounts based on the date they register, how many register at the same time, or by giving out a code.
Add scholarships and apply them to attendees after they've registered.
If you have any release forms, upload or attach them to Forms.
Create a custom confirmation message to be sent to all attendees after submitting their registration.
Configure Check-Ins for your event to take attendance using a station or Check-Ins event.
Once you've set up your signup, you can view it on Church Center.
Manage attendees
The Registrations tab shows you all the attendees registered for the signup and gives an overview of their registration information.
Tip
Once you set up your event and before you send it to others to register, register yourself for it! You can create a discount code just for testers, and you can cancel the registration once you've finished it.
Select New registration to register people for the signup, if they are unable to do it on the public page.
Select the Attendance dropdown to take attendance for those who attended the signup or any meetings.
Select the Actions dropdown and choose an option to email the attendees.
Select the Actions dropdown to create reports based on all attendees or export a report based on the attendees filters.
Payments
The Payments tab shows how much attendees have paid for this signup and how much is still due.
Assignments
The Assignments tab allows you to organize attendees by placing them in the right place. You can assign your attendees to specific areas, seats, classes, automobiles, groups, and more!
Tip
Make sure all attendees are assigned for the most helpful results!
Automations
The Automations tab is where you can set up actions to happen to a profile automatically in other Planning Center products when an attendee registers or cancels, or when a person is the registration contact of a new or canceled registration.
Get help and support
Any time you have questions, Planning Center's support team is here to help! Use the ? question mark icon in the toolbar to open the Help and support sidebar.
From here you can:
Search online documentation for an instant answer to your question. The toolbar also suggests help articles based on the page you are currently viewing.
Access getting started resources or jump into Planning Center University (PCU). You can also connect with other Planning Center customers in the customer communities and see what's new by checking out the changelog.
Connect with a support agent for one-on-one help. You can email them directly from the toolbar, or schedule a phone call if you prefer.
Depending on which Planning Center product you're using, you can also contact support directly from the corresponding mobile app:
Services/People: Tap your profile icon in the top right, then tap Help to access help articles or open a ticket with support.
Check-Ins: Tap the ⚙️ settings icon in the bottom right, then tap Contact Support to open a ticket with support.
Music Stand: Tap the menu icon (three horizontal lines) in the top left, then tap Help to access help articles or open a ticket with support.
Organization administrator requests
The following Support requests can only be made by organization administrators:
Data removal or corrections you can't make yourself (undo old CSV imports, iCal imports, etc)
Gain access to anything that was created and managed by someone else in the account
Restore or fully delete a canceled account
Request access to Giving (if there are currently no Giving administrators in the account)