Take attendance for Registrations signups
The best way to track who attends your event is to take attendance! First, decide whether you'll use the built-in feature in Registrations to take attendance or set up a synced event with Check-Ins so that you can print labels and use stations. Then, jump down below for instructions on both options.
Decide between Registrations and Check-Ins
If you don't need to print labels, take attendance in Registrations so that you'll have a record of who attended the specific event.
If you do need to print labels or want more detailed reporting, set up a synced event and take attendance in Check-Ins. Registrations can only create reports for the whole event, whereas Check-Ins can handle more detailed reports for multi-day or multi-time events.
Important
The Check-Ins integration is only available when choosing Named Attendees in the signup creation process.
Take attendance in Registrations
Select the Signups page from the top navigation in Registrations.
Select the signup from the list.
Select the Registrations tab.
Select the Attendance button in the top right.
Choose from the following options in the dropdown:
Select Take attendance for all participants to take attendance using the full roster of registered attendees.
Select Take attendance for these participants to take attendance using the filtered roster of registered attendees.
Check the box next to a person's name to select that they attended.
(Optional) To change the name of the attendance roster, select the Edit button next to the current name.
Select the Done button at the top of the roster.
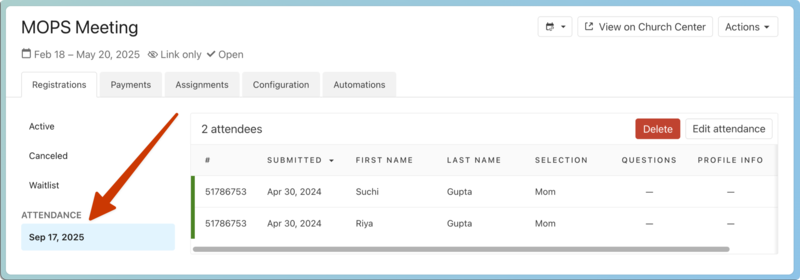
Attendance is saved in the Registrations tab of the signup, where you can view who attended and edit or delete the roster.
Set up a synced Check-Ins event
Take attendance tracking to the next level by creating a synced Check-Ins event for your Registrations signup!
With this integration, you can scan a QR code to check in using Church Center, set up rosters for your classrooms, print labels, and scan to check people out.
You must have editor permissions in Check-Ins to set up this integration.
Want to watch a video before you get started? No problem! This ten-minute video will demonstrate the integration in action.
Set up the integration in Registrations
Select the Signups page from the top navigation in Registrations.
Choose the signup for which you'd like to create a synced Check-Ins event.
Warning
In the future, if you archive the selected signup, the synced Check-Ins event will be archived as well.
Select the Registrations tab.
Select the Attendance button in the top right.
Choose Set up Check-Ins for this signup from the dropdown.
Select Create Check-Ins event to open the Check-Ins event creation wizard in a new tab.
Create the Check-Ins event
After following the instructions above, you can use the event creation wizard in Check-Ins to add your event's details, times, and locations.
Add the event details, including the frequency, start date, and campus.
(Optional) Enable the Church Center and/or Services integrations by selecting the corresponding checkboxes.
Select Next: Add times in the bottom right.
If the Registrations signup has event times available, they'll appear in the Registrations Signup Times box. Select Add time next to a signup time to add it to the Check-Ins event.
If there are no Registrations signup times available, manually set the event's start time in the Event time box.
Enter the time you'd like to allow people to start checking in in the Check-in begins box.
Enter the time you'd like to hide the event to prevent checking in or out in the Check-out ends box.
(Optional) Select Add time to add additional times to your event.
Select Next: Add location in the bottom right.
Choose whether or not you'd like to sync assignment types as locations.
If you selected Sync assignment type, choose the assignment type you'd like to sync as a location using the dropdown that appears.
Select Create event.
Upon creation, your event page in Check-Ins will open and display a banner that reads "This event is connected to [signup name] in Registrations." Selecting the signup's name in the banner will take you to Registrations.
Manage event settings
You can adjust event settings, add labels, create an announcement, and manage background checks from the Settings tab of your event in Check-Ins.
To open Check-Ins, select the product name in the top left corner of the page and choose Check-ins from the dropdown.
Select your event from the list in the left sidebar.
On the event's page, select Settings from the left sidebar.
Manage location settings and labels
On the event's Labels & Locations tab, synced assignment types and areas from Registrations appear as matching folders and locations in Check-Ins, with any age/grade options or capacity settings carrying over as location filters.
Important
If you're only syncing attendees to your Check-Ins event, you must add locations and set age/grade filters manually.
While assignment area options and filters must be managed in Registrations, you can select a location to manage labels.
Since synced assignment areas carry over as locations in Check-Ins, the Location Name field will print a person's single assignment on their label.
When creating custom labels, there are also a few unique field options only available for Registration integration events. The Registrations block type allows you to add the person's selection type, add-ons selected during registration, or a summary of all assignment types and areas for that person.
Take attendance in Check-Ins
After you've completed the setup steps in the section above, you're ready to check people in!
Check people in
During the window of time you set up on the Times tab, open a Check-Ins station to find your signup and check people in using a manned, self, or roster station.
If your signup isn't showing on the station, go to the station settings and deselect the lock setting to show all events, or choose your signup from the list. If there is no active session, you must open Check-Ins on a web browser and select Start a new session from the event's Settings tab.
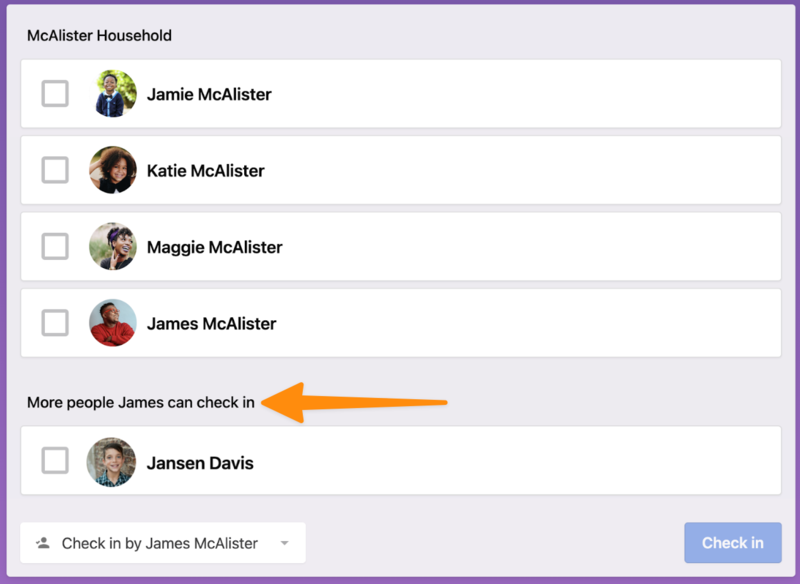
By default, attendees are grouped with their household members, but you can see other people from their registration group in the More people [name] can check in section.
 |
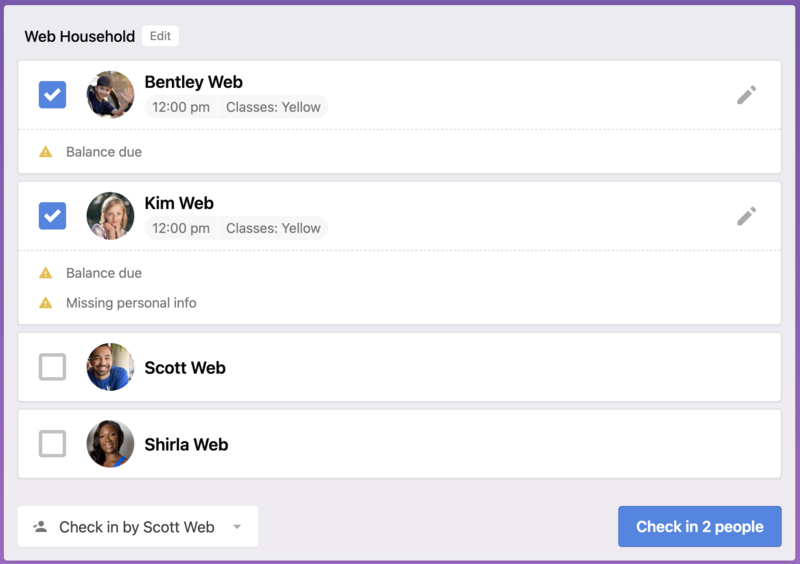
All Registrations alerts, like balances due, missing required forms, etc., are also shown in Check-Ins. If there's an alert for an attendee, it will pop up before you confirm the check-in.
 |
Important
If a registered person tries to check in at a self station and has an incomplete registration due to missing required questions or forms or a balance due, they cannot check in and are instructed to see a leader for help.
Roster stations only populate with attendees whose registrations are complete. If you have assignments/areas synced, roster stations can be locked to a specific one, or the stations can switch between them.
 |
Check in unregistered people
You can check unregistered people in at a manned or roster station, and a location will be suggested based on the location filters. Set their type to Guest to follow up with them after check-in.
 |
Important
Checking in does not automatically register someone for the event. Ask them to scan a QR code to register or have an administrator register them!