Introduction for administrators
Welcome to Check-Ins! This article introduces the key concepts in Check-Ins, which are designed to help you check people in and out quickly and safely with a flexible setup.
If you're moving from a different check-in system, slowly rolling it out for your church is recommended. Choose one month to run both systems simultaneously, and ask people to check into both systems on the week corresponding to their last name. Here's a format we've seen that works:
Week 1: A-F
Week 2: G-M
Week 3: N-R
Week 4: S-Z
Try to split the families as close to even as possible, and by the end of the month, you'll be ready to use Check-Ins! This system works well for most church sizes, but if you need help thinking through the rollout, reach out to Planning Center Support.
Key terms
There are a few key Check-Ins terms and definitions that are helpful to know while setting up:
Events are the services or gatherings where you want to track attendance.
Event sessions are the specific dates when you track attendance.
Locations are the places people can check into, such as a sanctuary or a nursery.
Stations are set up on devices like computers or tablets, where people can check in on their own or with the help of a volunteer.
Labels can be assigned to any location and printed when someone checks into that location.
Headcounts help you gather attendance totals instead of checking in specific people.
Create an event
Events are the main feature in Check-Ins. They help you gather attendance data and information on people checking in.
When you're ready, follow along with our Create an event article. While creating your event, you can manage location settings, add labels, and choose to require background checks for volunteers.
If you have multiple campuses, here are a couple of tips about setting those up in Check-Ins:
Create unique events for each campus (Campus A Sunday Services, Campus B Sunday Services, etc.), allowing you to tailor each event specifically to its campus.
If you use mobile Check-Ins, congregants can save their mobile pass to their phone's wallet for quick access when they're near the campus location.
Add labels
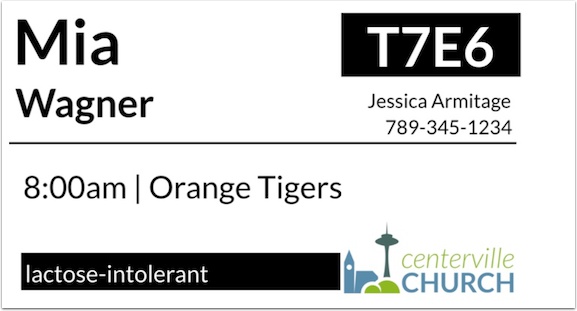
If you want name or security tags to print when someone checks in, the labels feature is made for you! Two labels are created in your account by default, but you can customize your own as well. Here's an example of the kind of information a label can include:
Once you create your own labels, you can add them to events and locations.
Create stations
Stations live in the Check-Ins app, which is available on iOS, Android, and as a desktop app. Once the app is downloaded, you're ready to create your first station.
Your device will become one of three types of stations:
A manned station is created for volunteers to check people in. From this station, a person can override any filters, add new people, edit people, and search by name.
A self station is created for people to check in themselves or household members by searching by phone number, barcode, mobile pass, or Church Center app.
A roster station creates a list of people who have checked in to a specific location before. A person can search by name, phone number, or barcode and add and edit people. A roster must be locked to a location.
Check people in
Once your events and stations are set up, you're ready to check people in.
When someone checks in to your event, their profile and check-in activity are added to Check-Ins. You can also add people ahead of time individually or in bulk using a CSV file.
Tip
Want to test your setup ahead of time? Doing so will let you troubleshoot any issues proactively and feel confident on event day.
Follow these steps to test Check-Ins:
Add an event time for the current date and time, and open any station.
Try checking people in, setting up your printers, and printing labels.
Test out the filters in the locations by checking in people who would attend that location.
Once you're finished testing, remove the temporary time and any test check-ins. Make sure a session is created for the actual time and date of your real event so you're ready to go.
Get help and support
Any time you have questions, Planning Center's support team is here to help! Use the ? question mark icon in the toolbar to open the Help and support sidebar.
From here you can:
Search online documentation for an instant answer to your question. The toolbar also suggests help articles based on the page you are currently viewing.
Access getting started resources or jump into Planning Center University (PCU). You can also connect with other Planning Center customers in the customer communities and see what's new by checking out the changelog.
Connect with a support agent for one-on-one help. You can email them directly from the toolbar, or schedule a phone call if you prefer.
Depending on which Planning Center product you're using, you can also contact support directly from the corresponding mobile app:
Services/People: Tap your profile icon in the top right, then tap Help to access help articles or open a ticket with support.
Check-Ins: Tap the ⚙️ settings icon in the bottom right, then tap Contact Support to open a ticket with support.
Music Stand: Tap the menu icon (three horizontal lines) in the top left, then tap Help to access help articles or open a ticket with support.
Organization administrator requests
The following Support requests can only be made by organization administrators:
Data removal or corrections you can't make yourself (undo old CSV imports, iCal imports, etc)
Gain access to anything that was created and managed by someone else in the account
Restore or fully delete a canceled account
Request access to Giving (if there are currently no Giving administrators in the account)