Add labels to events and locations
You can add labels to an event, folder, or location. You can even choose how many to print for each person and which status should receive a label. Use the default labels or create your own.
People with editor permissions can manage an event's labels by using Check-Ins on a web browser.
Event label overview
You can see an overview of an event's existing labels on the Labels & Locations tab. The labels have icons to display information quickly.
Select the Events page from the top navigation in Check-Ins.
Choose an event from the list.
Select the Labels & Locations tab from the left sidebar to see an overview of labels in each location.
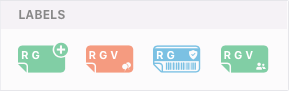
The letters on the labels represent the different check-in types: R for regular, G for guest, and V for volunteer.
Green icons are name labels.
Blue icons are security labels.
Coral icons are birthday labels.
A ➕ plus icon in the corner indicates that the label has been added to that level. Labels without a ➕ plus icon cannot be deleted from a level.
Add a label
You can add labels at the event, folder, or location level.
Select the Events page from the top navigation in Check-Ins.
Choose an event from the list.
Select the Labels & Locations tab from the left sidebar.
Select the event name, a folder name, or a location name to choose which level you'd like to add a label to.
The event level is the highest. Any labels added here are also added to your folders and locations. If all locations need a label, add it at the event level.
The folder level affects the locations inside the folder. Add labels here when you have locations that are all part of the same ministry and require the same label assignments.
At the location level, you can add specific label types, such as "diaper bag" tags, for your nursery kids only.
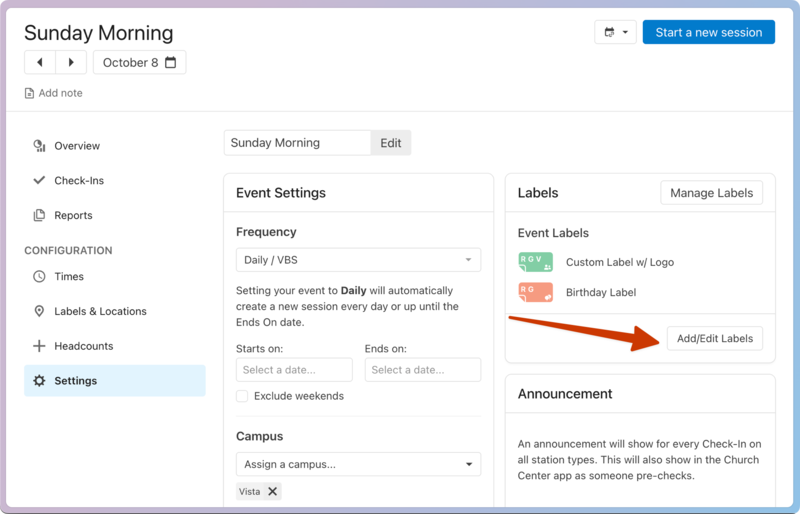
In the Labels section of the event, folder, or location, select Add/Edit Labels.
Choose a label type from the dropdown that appears.
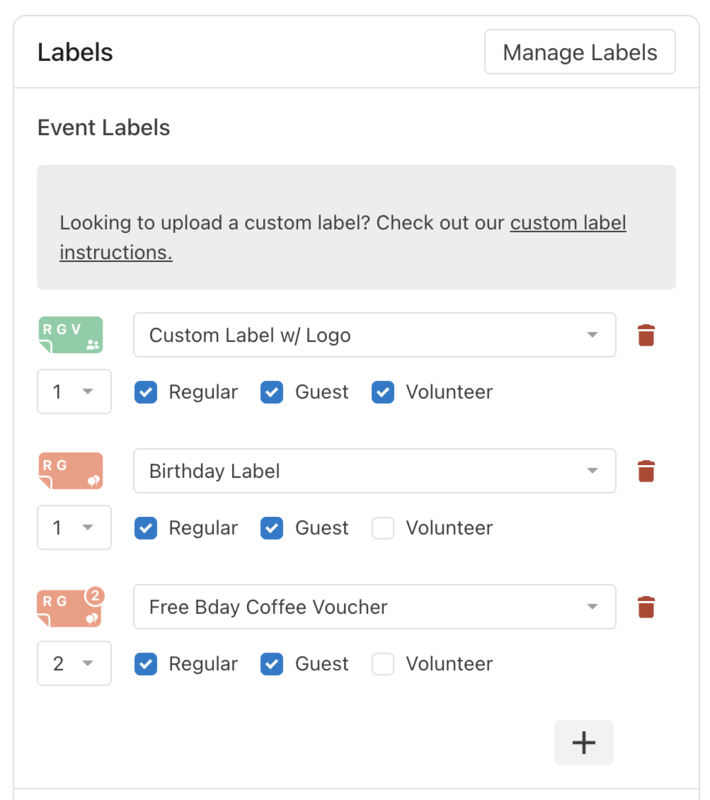
Use the number dropdown to choose how many labels to print.
Use the checkboxes to choose the check-in types for which this label should print (Regular, Guest, or Volunteer).
Tip
Some people want volunteer labels to look different from kids' labels. Select Volunteer to ensure your label prints for those checking in as volunteers.
(Optional) Select the ➕ plus icon to add another label.
Select Save once you're finished.
You can create an option to print extra labels for diaper bags and backpacks in the Options section of a folder or location.
Edit a label
Select the Events page from the top navigation in Check-Ins.
Choose an event from the list.
Select the Labels & Locations tab from the left sidebar.
Select the event name, a folder name, or a location name.
In the Labels section of the event, folder, or location, select Add/Edit Labels.
Use the dropdowns and checkboxes to change the label type, number of labels, or check-in types for each label option.
Select Save to apply your changes.
Remove a label
You can remove any labels from the event, folder, or location level.
Important
If you'd like to use Check-Ins without printing labels, remove all labels from your event or location. People can still check in when an event or location has no labels attached, but no labels will print.
Select the Events page from the top navigation in Check-Ins.
Choose an event from the list.
Select the Labels & Locations tab from the left sidebar.
Select the event name, a folder name, or a location name.
In the Labels section of the event, folder, or location, select Add/Edit Labels.
Select the 🗑️ delete icon next to the label you'd like to remove.
Select Save to apply your changes.
Tip
If you've removed labels, but you are seeing the No Printer Connected message on an Android or iOS station, clear the default printer in the settings and re-launch the app. The error is likely appearing because the station was previously connected to a printer and lost its connection to that printer. Once the printer is cleared, the message will no longer display.