Introduction for classroom leaders
As a leader, you're responsible for knowing who's in your classroom and ensuring everyone's safety. That's a big job, but Check-Ins helps you focus on the people in front of you by providing the tools to track who should be where and when.
If you don't have access to a shared device, ask your leader to install the Check-Ins app on your personal device. With the app, you can use a roster station to check people in and out of your classroom from your phone. Check out this video to learn how to use roster stations.
Check people in
Follow the steps below to check in people who arrive at your classroom:
Open the Check-Ins app on your device.
In the top left corner, make sure the station shows the correct event name.
Use the Location dropdown to choose your location.
From the Ready tab, tap the name of each person you need to check in. After a few seconds, they'll move to the Here tab.
(Optional) If no names appear on the Ready tab, use the search box to find and add people to the roster.
Select the Here tab to double-check that you've successfully checked in all the right people.
If people check in at the lobby and walk to your classroom, your church leaders may need you to confirm they've arrived safely. In this scenario, you may see an Unconfirmed section on the Here tab. Even if a name appears as unconfirmed, they're still fully checked in, but you can tap the arrow to the left of their name to confirm them.
If someone does not arrive at your classroom, send a text to alert their parent or guardian, or select the name to delete the check-in.
Tip
In the event of an emergency evacuation, teachers can view all individuals who have checked into their classrooms on the Here tab. If Check-out from all locations is checked, tap All locations to see everyone checked in across all locations in this event.
Fix an incorrect check-in
If you accidentally checked in the wrong person, you can fix it by following the steps below.
Go to the Here tab on your roster station.
Tap their name.
Select Delete check-in.
In the popup, select Yes, delete it.
Check the Ready tab to see their name reappear.
Check people out
From the Here tab, select the arrow to the left of the person's name. This will move them to the Checked out tab and include a timestamp. Learn more about checking out.
Add people to the roster
If someone new attends and is not yet in your database, you can create a profile for them right on your roster station and then check them in. Learn how to add people in Check-Ins using a station.
Download a class report
You can run attendance reports and download them as a PDF or CSV file to share more broadly. If you can't access Check-Ins using a web browser, ask an administrator for help.
Maintain security
Checking people in is just the start—keeping everyone safe is important, too. Check-Ins includes safeguards your church can use to highlight important safety information for each classroom and child.
View location capacity
If your location has a maximum capacity, you will see that on the Here tab.
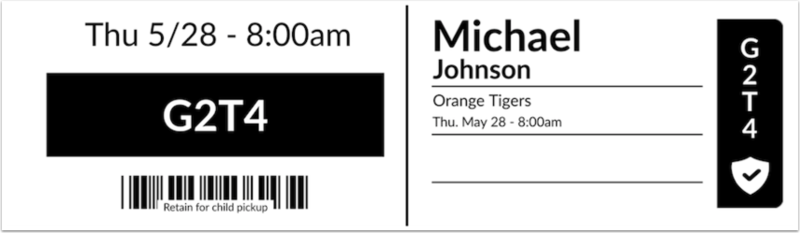
Use security codes on labels
Name labels can have a 4-digit alphanumeric code that matches the code on a security label. At pickup time, match the code on the child's label to the one shown by the person attempting to pick up the child.
 |
Checking out
You can see who checked in a child by looking at the person listed as the Checked In By person on their label.
 |
If the person picking up the child lost their security label, follow your church's security protocol!
Here's an example:
On your roster station's Here tab, type the security code from the name label.
(Optional) If someone is not authorized for pickup, a warning will be displayed. Select Find out who to see their name.
If the person picking up the child doesn't match the Checked In By person, you may need to ask a Check-Ins administrator for help to make sure they're a trusted person. The administrator can either:
Type the child's name on a manned station to view the list.
Or, they can go to that child's profile using Check-Ins on a web browser.
Once you've confirmed the person, tap the arrow next to the child's name to complete the checkout process.
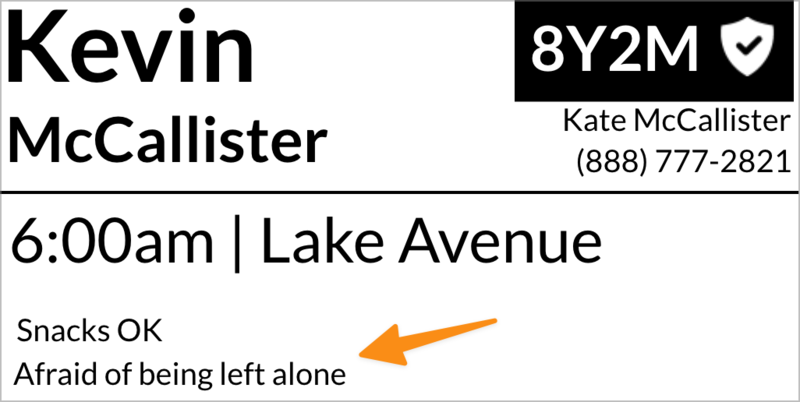
Review medical notes and allergies
Medical notes can be included on the label to ensure people aren't given something they shouldn't have. Always double-check this field to keep children safe.
 |
Contact parents or guardians
If you need to contact a parent or guardian, you can send a personalized or default text.
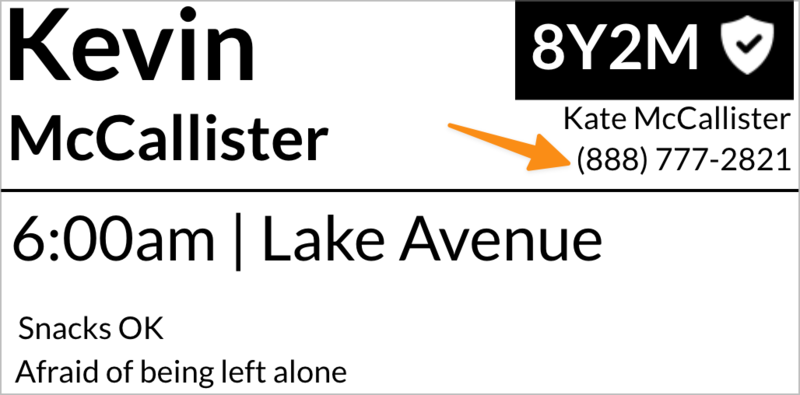
Send a personalized text
If a parent's phone number is listed on the label, text them from your own device, and they can respond back to you.
 |
Important
What if there's no phone number on the label? There are a few reasons why this might happen:
If a child was checked in at a roster station, where there's no way to specify the Checked In By person, a name and phone number will not print.
If a child was checked in at a self or manned station, and no Checked In By person was selected, a name and phone number will not print.
If a Checked In By name is printed, but there is no phone number, that person is missing a phone number in their profile.
If using a custom label, make sure that the label includes the Checked In By and Checked In By Phone Number fields.
Send a default text from a station
From the Check-Ins app, you can send a text to parents or trusted adults from the Here tab on a roster station. Tap the 💬 messaging icon next to the child's name to select a pre-written message. Recipients cannot reply.