Check in visitors
Have someone dropping in for a single event? Check them in as a visitor, either individually or as part of an existing household.
Visitors aren't saved to your People database, but you can temporarily add them using a manned or roster station and print a label. They'll appear in that session's reports and on the Check-Ins tab for that date.
Tip
If you plan to follow up with someone after the event, create a new profile and check them in with the Guest check-in type instead.
Manage child visitors
Check in visitors who attend on their own
Turning on the one-time visitor setting adds a Label only button to manned and roster stations, allowing you to check in visitors who arrive on their own.
Turn on the setting
In Check-Ins using a web browser, follow these steps to add a Label only button on stations.
Select Events from the top navigation in Check-Ins.
Select the event where you'll be adding visitors.
Select the Settings tab on the left side of the page.
Check the Enable label only mode box, and it will save automatically.
Check in the visitor
Using the Planning Center Check-Ins app, follow these steps to check in a visitor with a label.
On a manned station, type the visitor's full name in the search box.
On a roster station, type the visitor's full name in the search box and select Search [full name] outside of roster.
Select Add Person.
Select Label only.
Select the correct location from the dropdown.
Select the correct time from the dropdown.
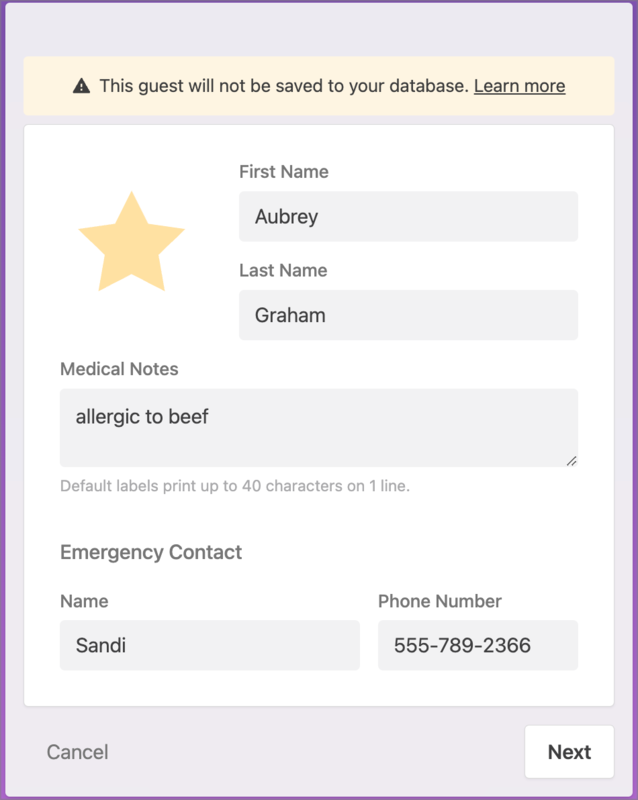
Fill out the contact form, including any medical notes and their emergency contact.
When you're done, select Print label.
Important
The person entered in the Emergency Contact fields will be the visitor's Checked In By person and can be contacted using a manned or roster station during the event. If no number is listed, the emergency contact cannot be reached.
Check in visitors who attend with an existing household
Using a manned station, you can check in visitors who attend with an existing family. The visitor will share a security code with the household.
On a manned station, type the existing family's name, phone number, or barcode into the search box.
Select the household.
In the top right corner, select Add visitor.
Fill out the visitor's full name, any medical notes, and their emergency contact details to print them on the label. If the emergency contact fields are blank, the Checked In By person's contact information will print instead.
Select Next.
Check the box next to the correct time and location.
(Optional) If the location is incorrect, select the ✏️ edit icon to select a new location.
Select Done to the right of the visitor's name.
Select Check in [number] people to complete the check-in.
Contact visitors
Visitor contact information exists only for the event, but you can use it to text their emergency contact or household primary contact before the event ends. Check out the Send a text article to learn how!
Important
Texting requires a US or Canada-based 10-digit mobile phone number. If the Emergency Contact fields are blank, the household primary contact's name and mobile phone number will be used. If the visitor was added on their own using the Label only mode and no number is listed, they cannot be contacted.
View visitor activity
Important
Visitors will not be included in People list results or Home widgets.
On the Check-Ins tab of the event, the visitor will be labeled as a guest with a VIP tag icon instead of a picture.
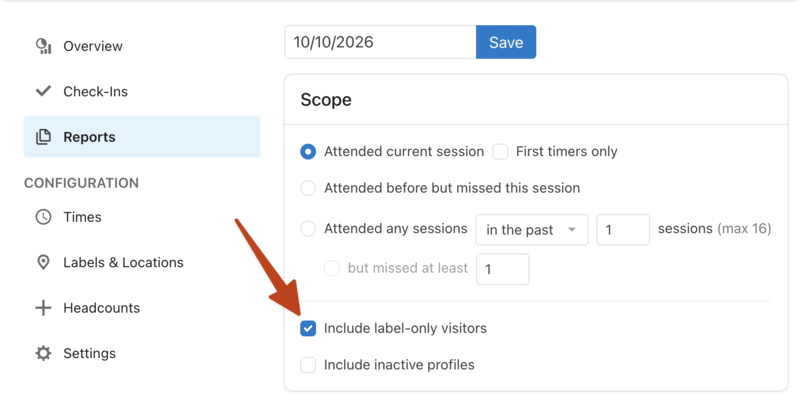
To include visitors in a custom report, check the Include label-only visitors box. In reports, all visitors appear as guests; to better distinguish them, choose the Regular/Guest/Volunteer layout.
 |