Use reports to track trends
Check-Ins event reports help you track weekly attendance numbers, trends, and rosters. You can choose whether to create a custom report or a headcount report, depending on what kind of information you want to see:
Custom Report: See information about people who have checked in to that session or other sessions, depending on your scope. You can customize the parameters included in the report.
Headcount Report: Headcount reports show number totals at a glance without setting custom parameters.
If you choose this option, you can include up to 53 past sessions in your report and choose whether to group your check-in totals by Time or Type.
Check-Ins editors can create new reports, while viewers can view previously created reports.
Tip
To find more specific information about people who attended the session, use People lists.
Create a custom report
If you have Check-Ins editor permissions, you can create a custom report by using Check-Ins on a web browser.
Select the Events page from the top navigation in Check-Ins.
Choose the event for which you'd like to create a report.
Select the Reports tab from the left sidebar.
Select Create a report if there are no previously created reports, or select New report in the top right.
Enter a name for your report.
Choose Custom Report from the Type dropdown.
Select Create Report to adjust your report parameters.
Choose the information you'd like to see in your custom report. Your changes are automatically saved.
Scope: Define the group of people you'd like to include in your report based on the sessions they attended.
Check Include label-only visitors or Include inactive profiles to see people who attended but aren't active in your database.
Layout: Choose whether to separate each page according to people's check-in type (Regular/Guest/Volunteer), location, time, or grade.
You can also choose to organize subgroups by check-in type, location, time, or grade. Within all groupings, people will automatically be sorted by their last name.
Include: Check the boxes next to the information you'd like in your report.
Check-in Info refers to the person who was checked in.
Primary contact refers to the primary person in the household.
Session specific details are only available if the Scope is set to the current session.
Your new report will appear on the event's Reports tab, where you can download and edit your event's reports.
Create a headcount report
If you have Check-Ins editor permissions, you can create a headcount report by using Check-Ins on a web browser.
Select the Events page from the top navigation in Check-Ins.
Choose the event for which you'd like to create a report.
Select the Reports tab from the left sidebar.
Select Create a report if there are no previously created reports, or select New report in the top right.
Enter a name for your report.
Choose Headcount Report from the Type dropdown.
Enter how many past sessions you'd like to include in your report (53 max).
Choose whether to group the report by Type or by Time.
Select Create Report to finish creating your headcount report.
Your new report will appear on the event's Reports tab, where you can download and edit your event's reports.
Download and edit reports
You can download and edit an event's existing reports using Check-Ins on a web browser.
Select the Events page from the top navigation in Check-Ins.
Choose an event from the list.
Select the Reports tab from the left sidebar to view a list of existing reports in that event.
Choose the Preview, ⬇️ CSV, or ⬇️ PDF buttons below a report to preview it or download the corresponding CSV/PDF file.
Important
If you don't see the PDF option for a headcount report, you have too many custom headcounts. You must generate a CSV instead.
Select a report name to edit its parameters.
Delete a report
If you no longer need a report, you can delete it while using Check-Ins on a web browser.
Warning
Deleted reports cannot be recovered.
Select the Events page from the top navigation in Check-Ins.
Choose an event from the list.
Select the Reports tab from the left sidebar to view a list of existing reports in that event.
Select the name of the report you'd like to delete.
If you chose a custom report: Select Delete Report in the bottom left of the report parameters page.
If you chose a headcount report: Select Delete in the bottom left of the Edit Report popup.
Select Yes, delete it in the confirmation popup to permanently delete the report.
Common reports
Below are some common examples of Check-Ins reports. If you don't see the report you’re looking for, check out People lists instead!
A roster station can be used to check kids out. However, if you need a paper copy, create a Check Out Sheet and include any necessary information about trusted people and the options a person brought with them.
Important
If you use this report, you still have to manually check people out.
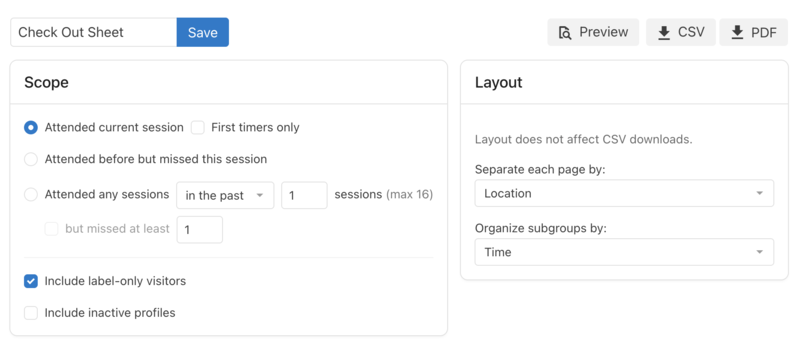
The report will show all the information you included.
Tip
If you have more than one time for the event, you can organize your subgroups by time.
If you want to see those who attended for the first time, you can run a report that shows only first timers or one that shows first timers mixed with other attenders.
Select the First timers only option in the Scope section to generate a report of people who attended the event for the first time.
When you view the report, you'll see the information you chose to include on the report options.
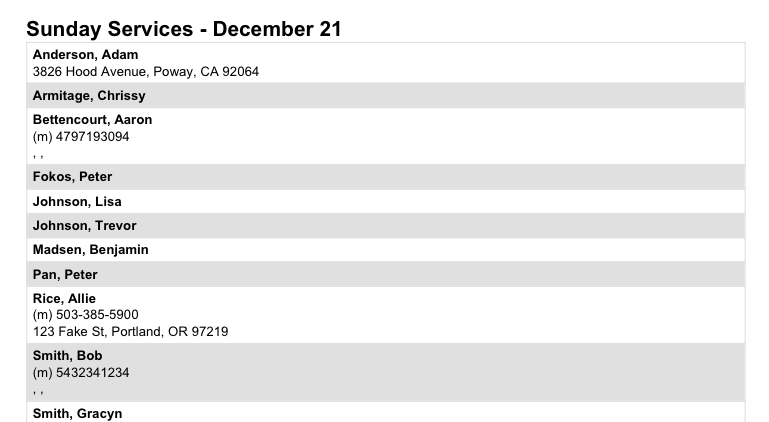
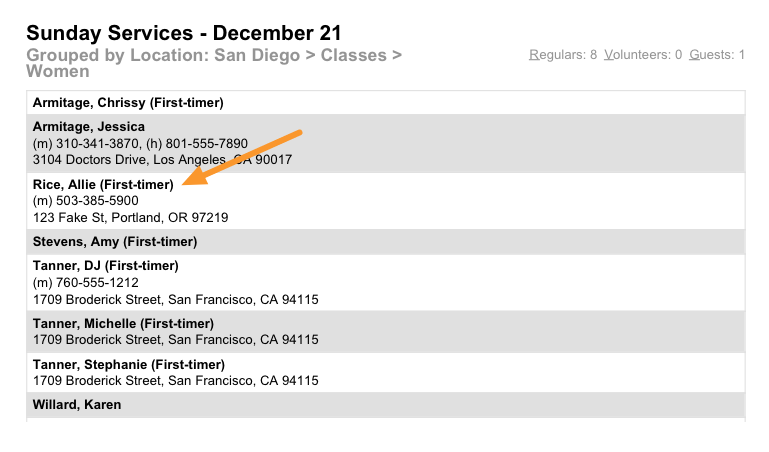
Create a report with both regular attendees and first timers by selecting the First timers option in the Include section.
Any first timer will be noted on the report.
If you want to follow up with people who missed the current session, create a report with the Scope set to Attended before but missed this session, and include the information you'll use to follow up with the people who missed.
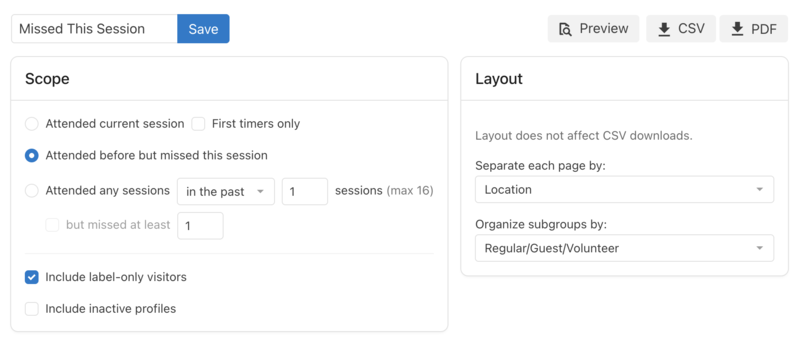
Your report will show you who missed this week, and you can follow up with them if they have contact information listed.
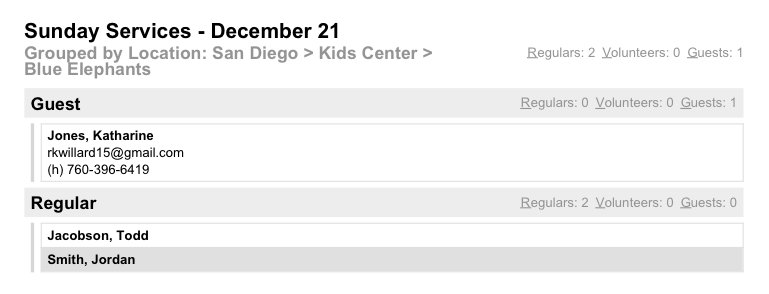
Use a roster station to see who is in your classroom. However, if you want a printout, you can create a Room Roster.
In order to get the report you want for the Room Roster, set your custom report parameters accordingly:
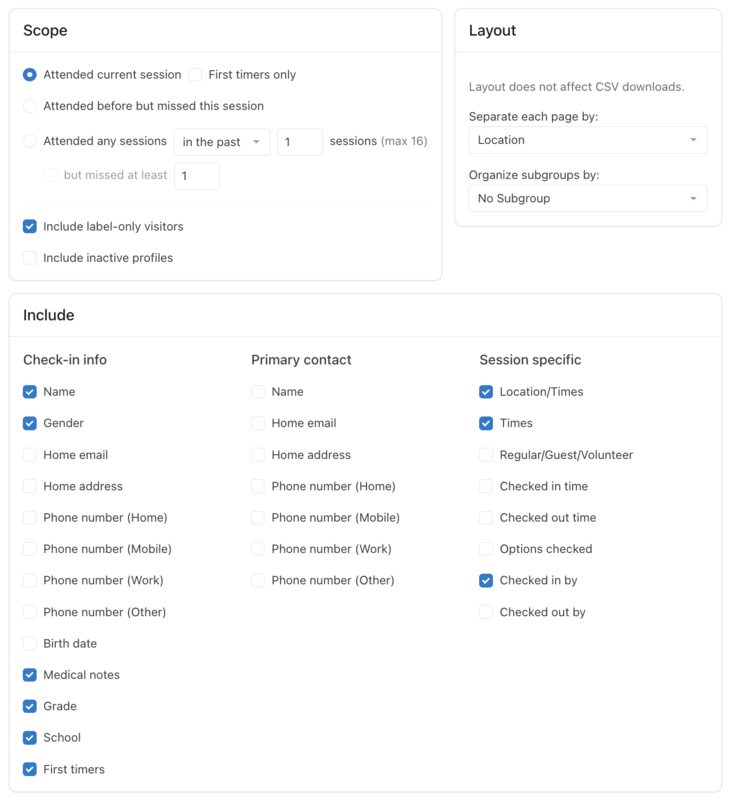
Make sure to only include people who attended this current session.
If you're printing a PDF, separate each page by location, so you can pass the roster out to each classroom.
If you're printing a CSV file, check the Location/Times box in the Include section.
Include the person who checked them in. Only the name will show on the report, but you can see the name and phone number on the child's label.
You can get a report of attendance over a year in a CSV format.
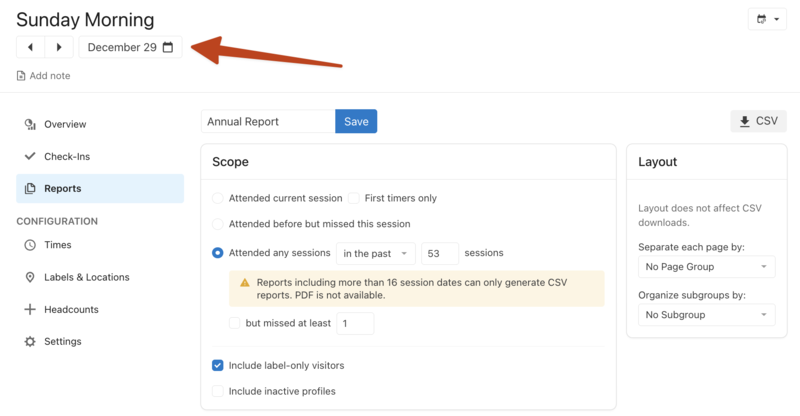
Go to the last session date you want in your report.
Manually update the Attended any sessions in the past X sessions field to 53.
Select the ⬇️ CSV button to download the CSV report.
Tip
If you want a report for multiple years, you can create a report for one year at a time and combine the CSV files. Navigate to the week before the first session date of your most recent annual report and run the report again to get the previous year's records.