Request rooms and resources for an event
Once you create an event, you can request any rooms or resources you need for it. Requesting rooms and resources for events helps you avoid scheduling conflicts and ensures that your events go through an approval process.
Important
Administrators can request rooms/resources for any event, while creators can only request rooms/resources for events they've created.
Request a room or resource
To request rooms and resources for an existing event:
Select the Events page in the top navigation.
Open the event page for which you'd like to request rooms and resources:
In month view: Choose an event from the calendar, then select View event to open the event page.
In table view: Choose an event from the list to open the event page.
Select Edit in the top right.
If this is a recurring event, choose whether to edit This date only or This and future dates.
Add rooms, resources, and additional details to the Rooms & Resources section:
Search for a room or resource and select it from the dropdown to add it to the event.
Warning
Rooms or resources that are blocked out for your event's scheduled date and time cannot be selected.
Select the 🗓️ calendar icon next to a room to display it on the public Church Center page, if applicable. Only approved rooms will show on the Church Center event page.
Select the arrow to the left of a room or resource to expand its Details, Notes, Questions, and Setup tabs:
Details: View the approval details of the requested room or resource. This will show as "Pending" while you're still editing the event because the requests aren't sent until you save your changes.
Notes: Add any notes about your request for the approval group members.
Questions: Answer any questions that are attached to this room or resource. If the room or resource has any required questions, this tab will automatically be expanded.
Setup: Choose a room setup from the dropdown or view any suggested resources, if applicable.
(Optional) Drag and drop the requested rooms and resources to re-arrange the order in which they're displayed.
Select Save for this date or Save for this and future dates to apply your changes. This sends a request to the corresponding approval group members.
Important
If the requested resources exceed the quantity available, the event owner and managers will receive an email.
Track approval status
You will receive an email once your event has been approved or rejected. You can track your event's status using the Month view of the Calendar tab on the Events page.
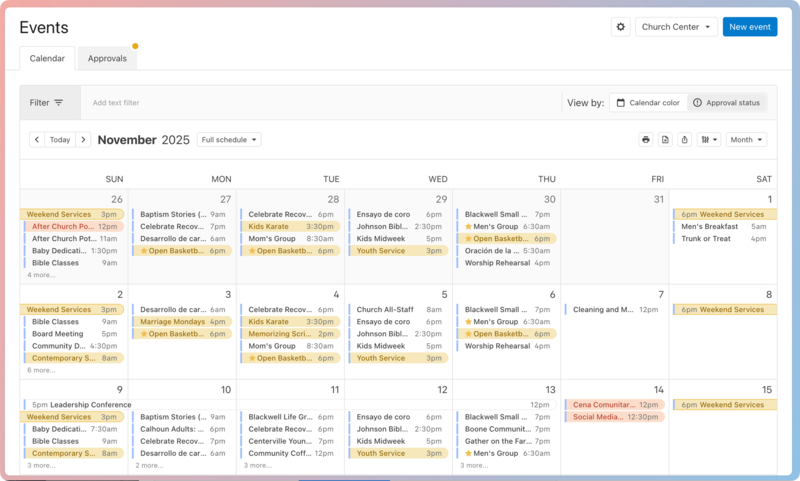
Select Approval status from the toggle in the top right to highlight events according to their approval status:
Pending events are highlighted in yellow.
Rejected events are highlighted in red.
Approved events are not highlighted.
Once your event is approved, display it on a kiosk or share it on your website!