Customize the calendar view
Customize your calendar view by choosing how you'd like events to be displayed. Calendar offers two views that can be customized to fit your needs:
Month view organizes your events on a calendar for the selected month.
Table view shows all your events in a list.
Switch calendar views
To switch between the two calendar views:
Select the Events page from the top navigation in Calendar.
Select View settings in the top right of the calendar.
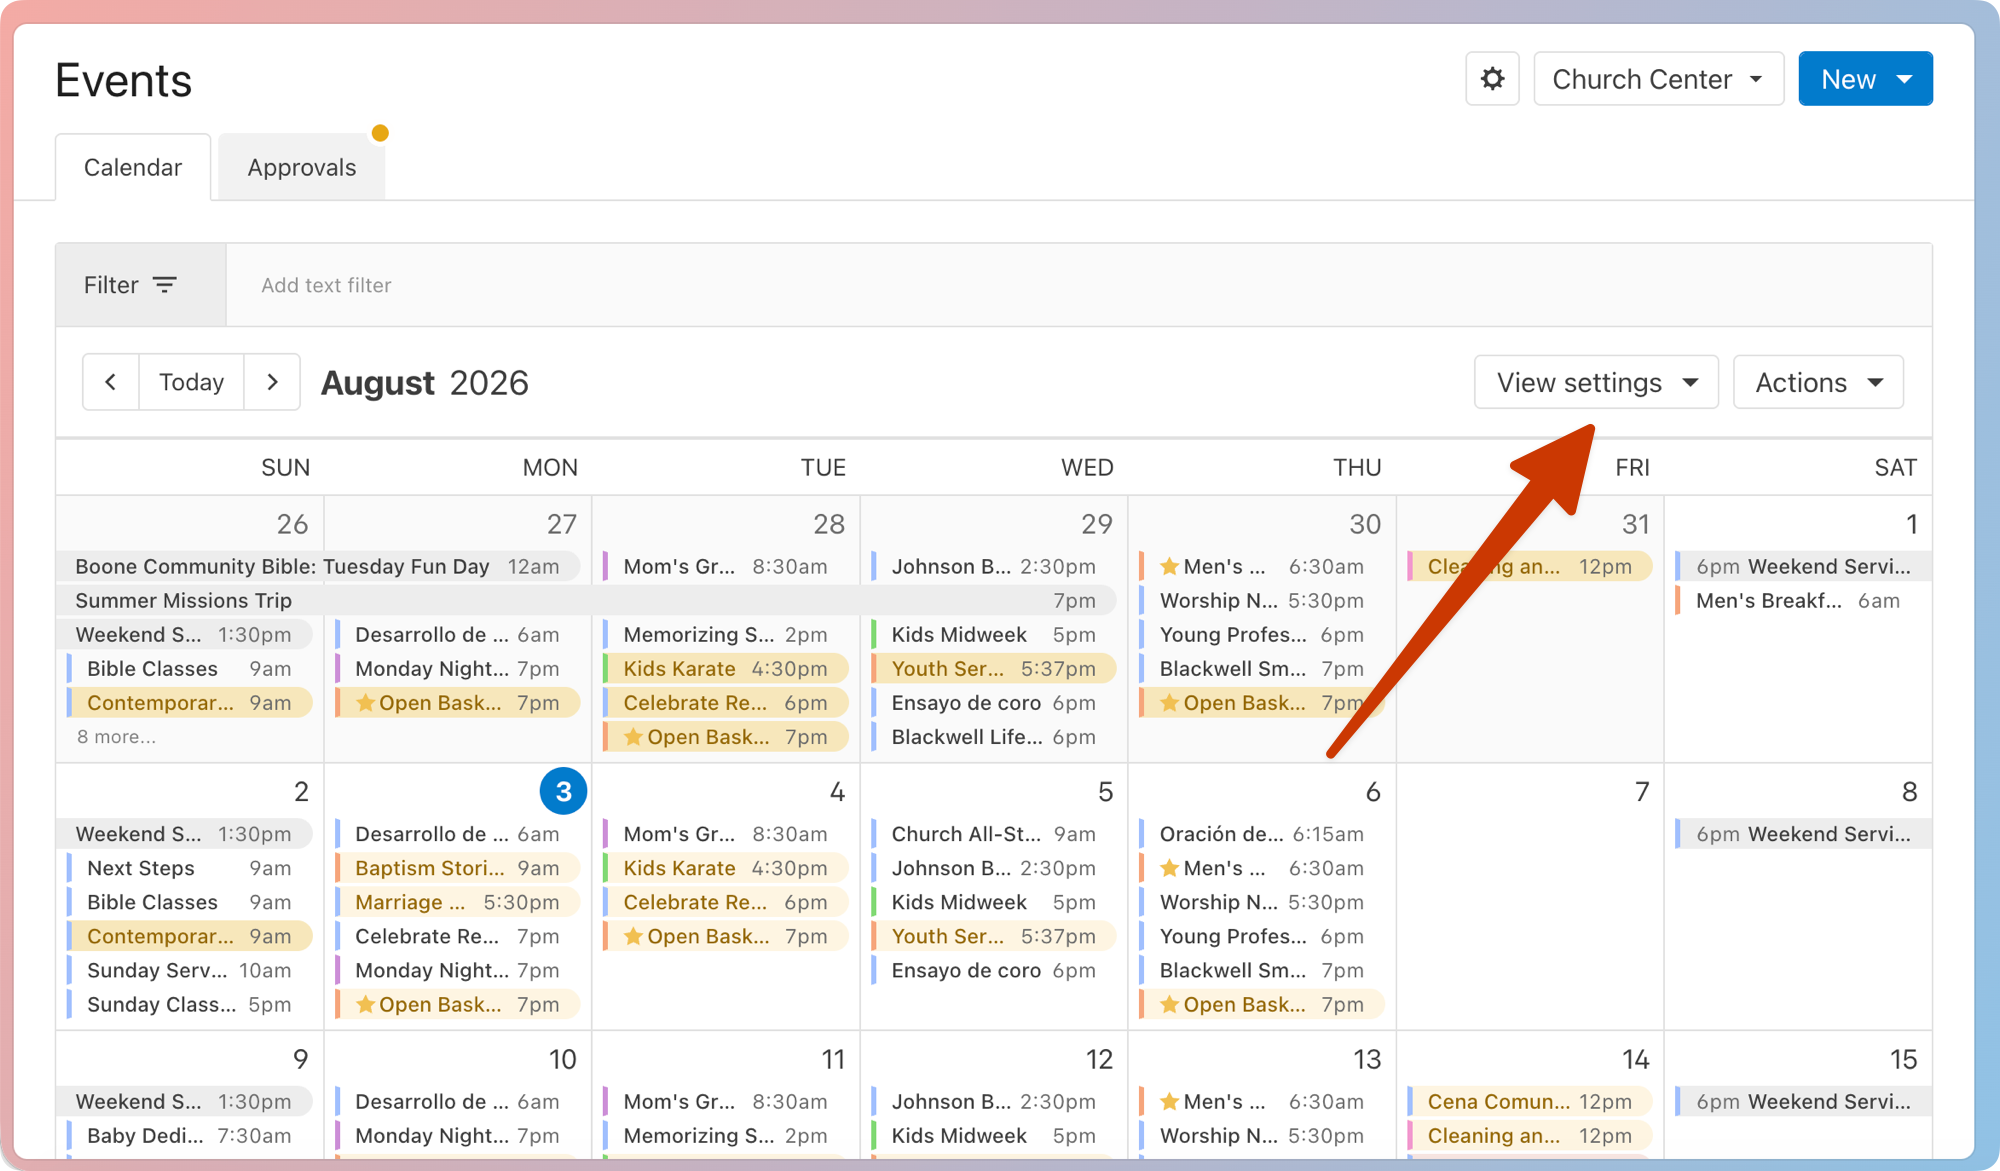
Choose either Month or Table from the dropdown.
Your view settings are saved to your browser, so they'll be automatically applied the next time you open the Events page. These view settings will not be applied to anyone else in Calendar.
Month view
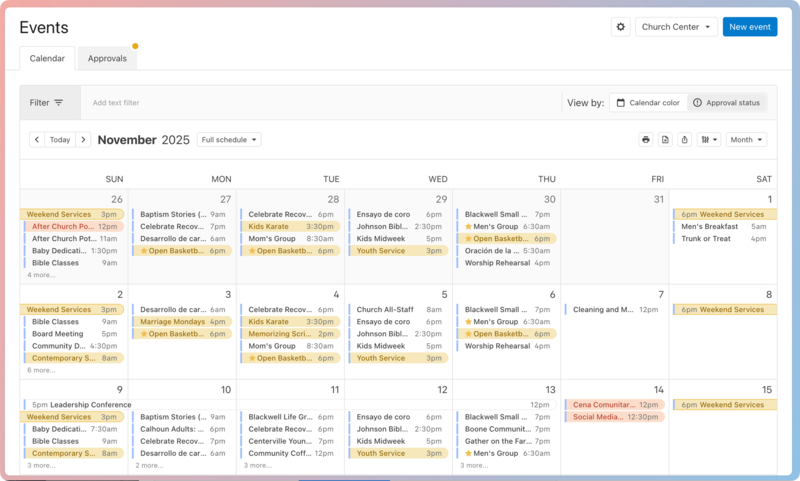
You can take the following actions on the month view:
Use the < > arrows in the top left to switch between months. Select Today to go back to the current month.
Select the month or year in the top left to choose a different month or year.
Select the View settings dropdown in the top right of the calendar to further customize how events are displayed:
View: Switch between the month or table views.
Color: Choose whether to highlight events according to their calendar color or approval status.
Calendar color: If you have multiple calendars in your organization, events are highlighted by the color of the calendar they belong to.
A yellow ⚠️ warning icon appears next to pending event request form events or events with pending rooms or resources. A red ❗️ warning icon appears next to events with at least one rejected room or resource.
Approval status: Events are highlighted according to their approval status. A yellow highlight indicates a pending event request form event or an event with pending rooms or resources. A red highlight indicates that the event has at least one rejected room or resource.
The color line to the left of an event indicates which calendar it belongs to.
Schedule: Choose whether to view the full schedule or public times only. The Public times only view won't show event times that have been hidden from shared calendars.
Density: Change the number of events that appear inside the calendar squares by choosing one of the options. Condensed shows six events per date, Expanded shows 12 events, and All Events shows every event.
Appearance: Choose the Tag dots option to show color-coded dots next to each event based on your tag colors, or choose Dim past events to display past events in gray.
Select Actions in the top right to share events, print the current calendar month, or run a report.
Table view
Important
Recurring events will only display the next upcoming instance.
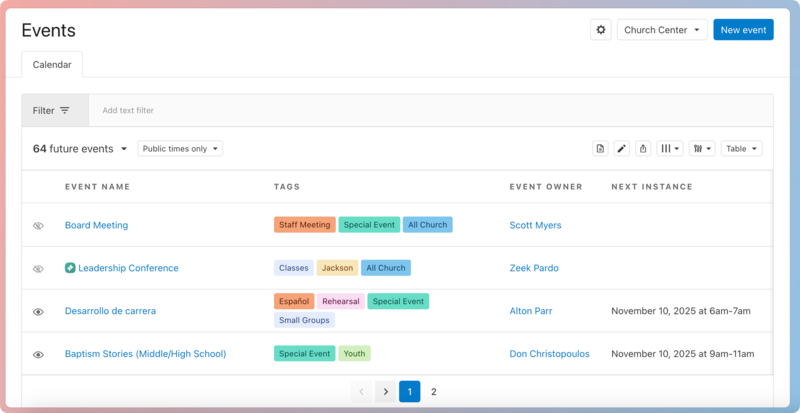
You can take the following actions on the table view:
Select [number] future events in the top left to choose whether to view all events, future events, or past events.
Select the View settings dropdown in the top right of the list to further customize how events are displayed:
View: Switch between the month or table views.
Schedule: Choose whether to view the full schedule or public times only. The Public times only view won't show event times that have been hidden from shared calendars.
Columns: Choose which columns to display on the table view.
Density: Adjust how the table view displays information. Choose Compact to fit more rows on the screen, or choose Comfortable to add spacing between rows for easier reading.
Select Actions in the top right to bulk edit filtered events, share events, print the list of events, or run a report.
Select a column header to sort the list according to that column.