Create and run reports
You can run a default report on an event, room, or resource, or create a custom report using HTML and CSS.
Create a default report
Important
Your reports will only include events that fit the filters currently applied to your calendar.
Select the Events page in the top navigation.
Select the 📄 report icon in the top right.
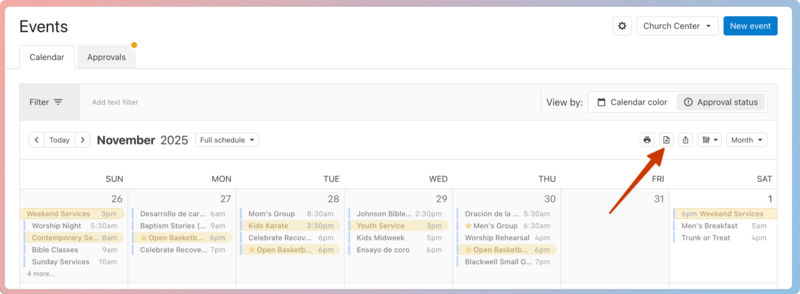
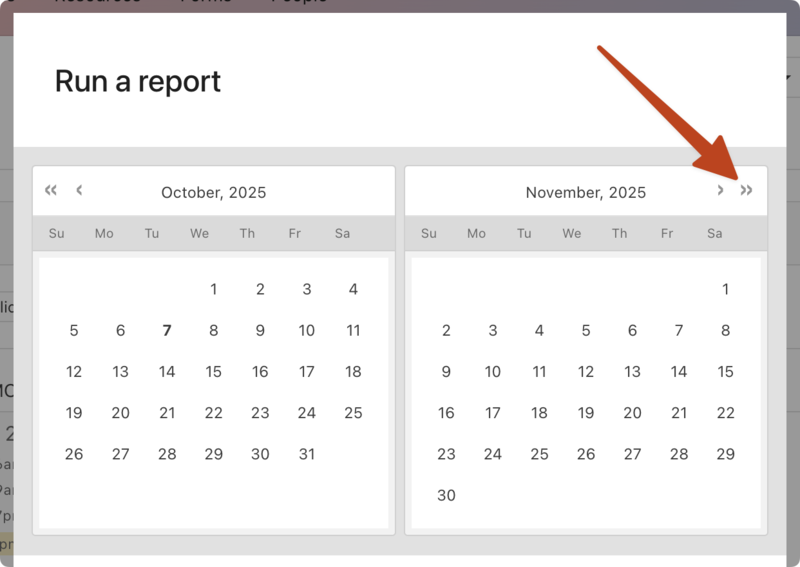
Adjust your report options in the popup that appears.
Set a date range for your report using the calendars at the top.
Report: Choose what type of report to run from the dropdown. Once a report is selected, its description will appear beneath the dropdown.
Format: Choose whether to export the report as a PDF, web page, or CSV. (Not all report types can be exported as a CSV.)
Options: Choose whether to show room setup diagrams at the end of the report and whether to show public times only or the full schedule.
Feeds: Choose whether to include events from specific feeds.
Forms: Choose whether to include events from specific event request forms.
Select Run report to generate your report.
Print vs. digital report
One of the goals of Calendar is to save you from needing to use a printed, monthly calendar.
Here's why:
Most churches have a lot going on, and fitting multiple events into tiny day squares (necessary for a month-at-a-glance view) is limited by design. Each square only fits 4-5 events max, but by running those events in a list view, there's no limit to the number of events you can fit into a report.
The product itself is accessible by computer, phone, or tablet. Calendar feeds allow you to subscribe to various calendars on any software, and the embeddable calendar enables your church to display the events of the day on your church website.
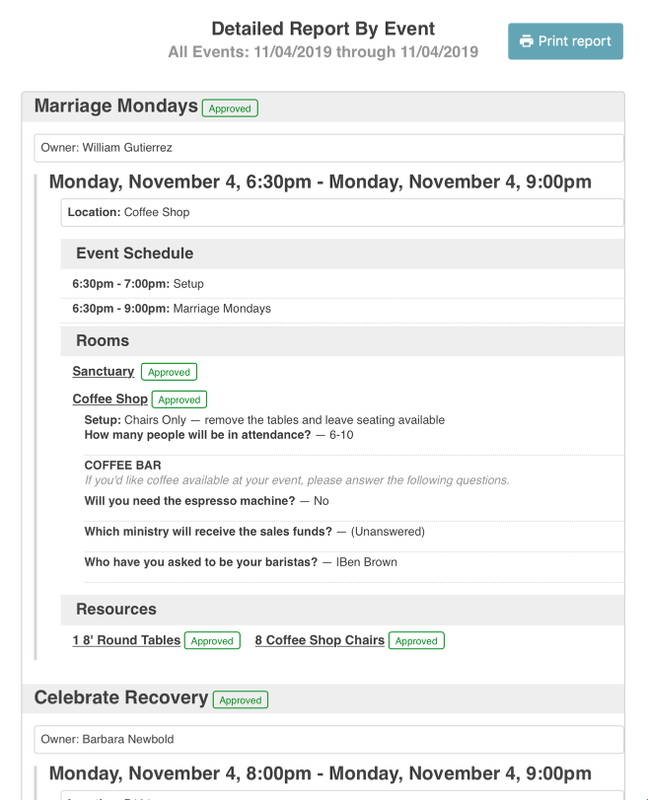
Detailed reports provide helpful information, such as the rooms or resources used, the event's schedule, and room setups. One primary use of reports is communicating event needs to the setup/maintenance crew.
Common reports
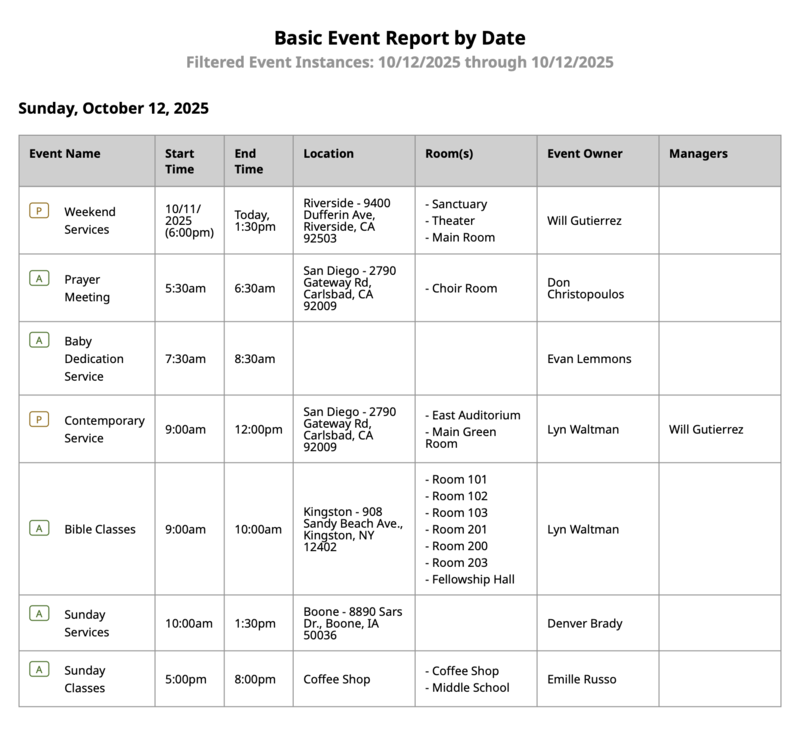
If you'd like to see activities happening on a specific date, use the Basic Report By Date (New).
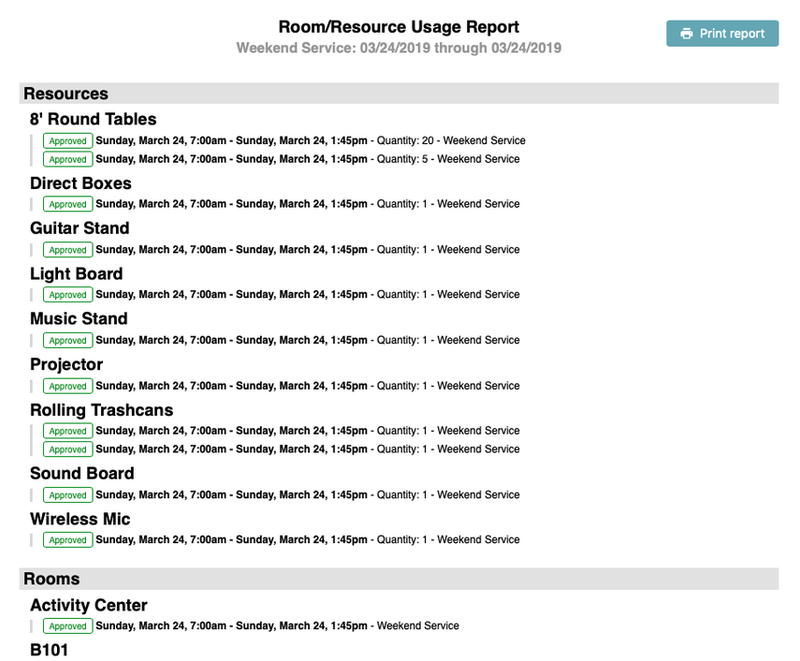
View all the rooms and resources used for one event by running the report from that event's page.
Select the Actions button at the top of the event's page.
Choose Run report from the dropdown.
In the Report section of the popup, select the dropdown arrow and choose the Room or Resource Usage Report option.
(Optional) Select a different format and adjust options as needed.
Select Run report at the bottom of the popup.
Create a custom report
Event creators, event administrators, room editors, and resource editors can edit custom reports.
Select the Events page in the top navigation.
Select the 📄 report icon at the top of the calendar to open the Run a report popup.
Scroll to the bottom of the popup and select Edit reports.
Select a default report as your starting point by selecting the ➕ New button to the right of it.
Enter a title for your custom report.
Add a description.
Use the code editor to create your report.
Select Create to finish.
For help with coding your report, check out our information on using Liquid for custom reports.