Add resources
Resources are items people can request for events. You can set a quantity for each resource to keep track of item availability. Setting up resources helps you plan events by ensuring people can request everything they need to make an event happen.
If you have resource editor permissions, you can follow the steps below to create and manage resources for your account.
Tip
Check out common resources to see the types of resources being created by other churches!
Create a new resource
To add a new resource:
Select the Resources page from the top navigation.
Select New in the top right.
Choose Resource from the dropdown.
Enter a name for your resource.
Enter a quantity for the resource. This affects how many instances of this item can be reserved at a time.
Select a parent folder for the resource.
Check the boxes next to any approval groups you want to assign to this resource.
Select Create. This takes you to the resource's settings page.
Update resource settings
To open a resource's settings page:
Select the Resources page from the top navigation.
If you have multiple folders, select the folder containing the resource you'd like to update.
Select the name of the resource you'd like to update.
You can edit a resource's details, approval groups, and questions on this page. Check the calendar to find dates for which this resource has been requested or blocked out!
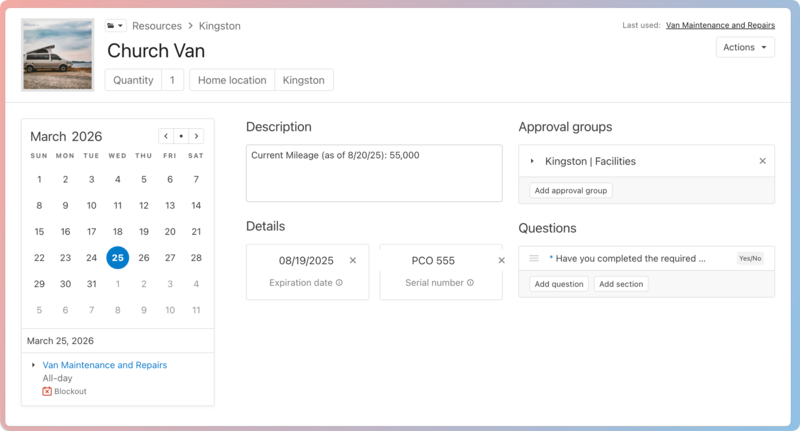
Select the resource image to update it.
Important
Use the image sizing guide to upload the right size and file type.
Select the 📁 folder icon in the top left to move the room to a different folder.
Select the Quantity field to update the resource quantity. Enter a Home location to indicate where the resource is stored.
Select the Actions button to take the following actions:
Edit the resource name.
Share a calendar feed that outlines when the resource is being used.
Run a report for the resource.
Duplicate the resource.
Create a blockout for this resource.
Delete the resource.
Select a dotted date from the calendar to see when the resource has been requested.
Description: Add a description to give more context about the resource.
Details: Enter the date the resource might need to be replaced and the serial number to help with re-ordering.
Approval groups: Expand sections to see who is listed in each approval group. You can remove an approval group by selecting the X next to it or add additional groups by selecting Add approval group.
Questions: Ask any necessary questions for requesting the resource. This helps the approval process by allowing you to gather additional details about the reservation upfront. You can add multiple standalone questions or group them up by section.
Warning
If you no longer use a resource and need to delete it, run a year report first to ensure that the resource isn't used in the next year. When a resource is deleted, it is deleted from all events, and pending approval requests for the resources will no longer be displayed in notifications.
Duplicate a resource
If you have a resource that needs the same questions and approvals as another resource, duplicate it!
Select the Resources page from the top navigation.
If you have multiple folders, select the folder containing the resource you'd like to duplicate.
Select the resource you'd like to duplicate.
On the resource's settings page, select the Actions button.
Choose Duplicate from the dropdown.
Enter a name for the new resource.
Enter a quantity for the resource.
Select a parent folder for the resource.
Check the boxes next to any approval groups you want to assign to this resource.
Select Create to finish duplicating the resource.
Review resource reservations
You can review scheduling information for multiple resources on the Resources page.
Select the Resources page from the top navigation.
If you have multiple resource folders, select the folder you'd like to review.
Select a dotted date on the calendar. Events that have requested or blocked out resources from this folder will be displayed below the calendar.
Select the arrow next to an event's name to expand the event details and view the requested resources.