Introduction for team leaders
Each team in Services should have at least one leader assigned to it. The team leader is a member of the team and can schedule, manage, and email team members. Leaders can choose which scheduling notifications they would like to receive for their teams.
If you have scheduler permissions, you can only schedule , auto-schedule, email, or set up teams for which you are a team leader. You can ask your administrator to give you team leader permissions for the teams that you want to schedule.
Tip
If you cannot log in, follow the steps in the Log in to Planning Center article.
Schedule team members
The Schedule your teams article walks you through the most commonly used process for creating and scheduling teams to plans. The main steps for scheduling teams include:
Create a team. Teams belong to service types, so when you create a team, you can schedule those team members to any plan in a service type. When you create a team, you are automatically assigned as the team leader.
Set up scheduling templates that you can use to schedule team members who serve together regularly. For example, you could have a template with teams that serve the 1st and 3rd Sundays of the month, and another template for the 2nd and 4th Sundays.
Schedule people to plans. Import your templates into the plans that you want to schedule people to. If you have open needed positions after importing the template, add people to those positions.
Send notifications. Email people that you've scheduled to notify them of their assignments.
You can also use the matrix to schedule more than one week at a time.
Leader notifications
If a leader is set as the replies to person in the team settings, they can choose whether to receive notifications whenever team members accept or decline scheduling requests. Any team leader can choose to receive notifications when team members add blockout dates.
From the team's Members tab, select Team leaders in the left sidebar. Use the checkboxes in the Notifications column to set which notification types each leader should receive.
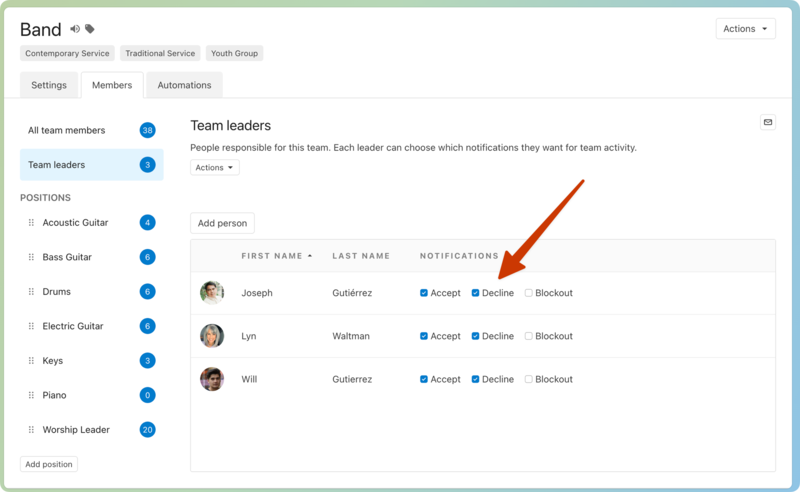
Any of these options can be checked for each leader, but the Accept and Decline options only apply if the leader is set as the "replies to" person:
Accept: The leader will receive an email every time a team member accepts an assignment.
Decline: The leader will receive an email every time a team member declines an assignment. The leader will have the option to reschedule the position from the decline email.
Blockouts: If a leader is set to receive blockouts, they will receive an email every time a team member sets blockout dates.
If the person who schedules someone is not a leader of that team, their notification options come from the replies to defaults set on the team settings tab.
Get help and support
Any time you have questions, Planning Center's support team is here to help! Use the ? question mark icon in the toolbar to open the Help and support sidebar.
From here you can:
Search online documentation for an instant answer to your question. The toolbar also suggests help articles based on the page you are currently viewing.
Access getting started resources or jump into Planning Center University (PCU). You can also connect with other Planning Center customers in the customer communities and see what's new by checking out the changelog.
Connect with a support agent for one-on-one help. You can email them directly from the toolbar, or schedule a phone call if you prefer.
Depending on which Planning Center product you're using, you can also contact support directly from the corresponding mobile app:
Services/People: Tap your profile icon in the top right, then tap Help to access help articles or open a ticket with support.
Check-Ins: Tap the ⚙️ settings icon in the bottom right, then tap Contact Support to open a ticket with support.
Music Stand: Tap the menu icon (three horizontal lines) in the top left, then tap Help to access help articles or open a ticket with support.
Organization administrator requests
The following Support requests can only be made by organization administrators:
Data removal or corrections you can't make yourself (undo old CSV imports, iCal imports, etc)
Gain access to anything that was created and managed by someone else in the account
Restore or fully delete a canceled account
Request access to Giving (if there are currently no Giving administrators in the account)