Auto-schedule your team
Simplify your scheduling process by using the auto-scheduling feature! The auto-scheduler fills needed positions with available team members based on their last scheduled date, blockouts and conflicts, and scheduling preferences.
Auto-schedule for a single plan or multiple plans at once using the matrix view! You can also adjust your team's default settings to automatically run the auto-scheduler whenever people decline.
Important
Schedulers can only auto-schedule teams where they're listed as a team leader. People with editor permissions or higher can auto-schedule any team.
How does the auto-scheduler work?
The auto-scheduler looks at the following information in this order when choosing which team members to schedule:
The team member's last scheduled date (which could be in the future)
In other words, the auto-scheduler always prioritizes the person who hasn't been scheduled for the longest time. Scheduling preferences aren't weighed as heavily as the "last scheduled date" or blockouts/conflicts.
Tip
Check your team settings to ensure the last scheduled date comes from the right place. Changing the setting to Last used in this team or Last used in this position can improve your results.
Auto-schedule a single plan
Select the Plans page from the top navigation in Services.
Select a plan for which you want to auto-schedule.
Select the Teams tab.
(Optional) Adjust your needed positions for this plan:
Select Team actions in the top right.
Choose Needed Positions from the dropdown.
Select the plus and minus (+/-) icons to choose how many people need to be scheduled for each position.
Select Done in the top right to save your changes.
Select the 🪄auto-schedule button in the top right.
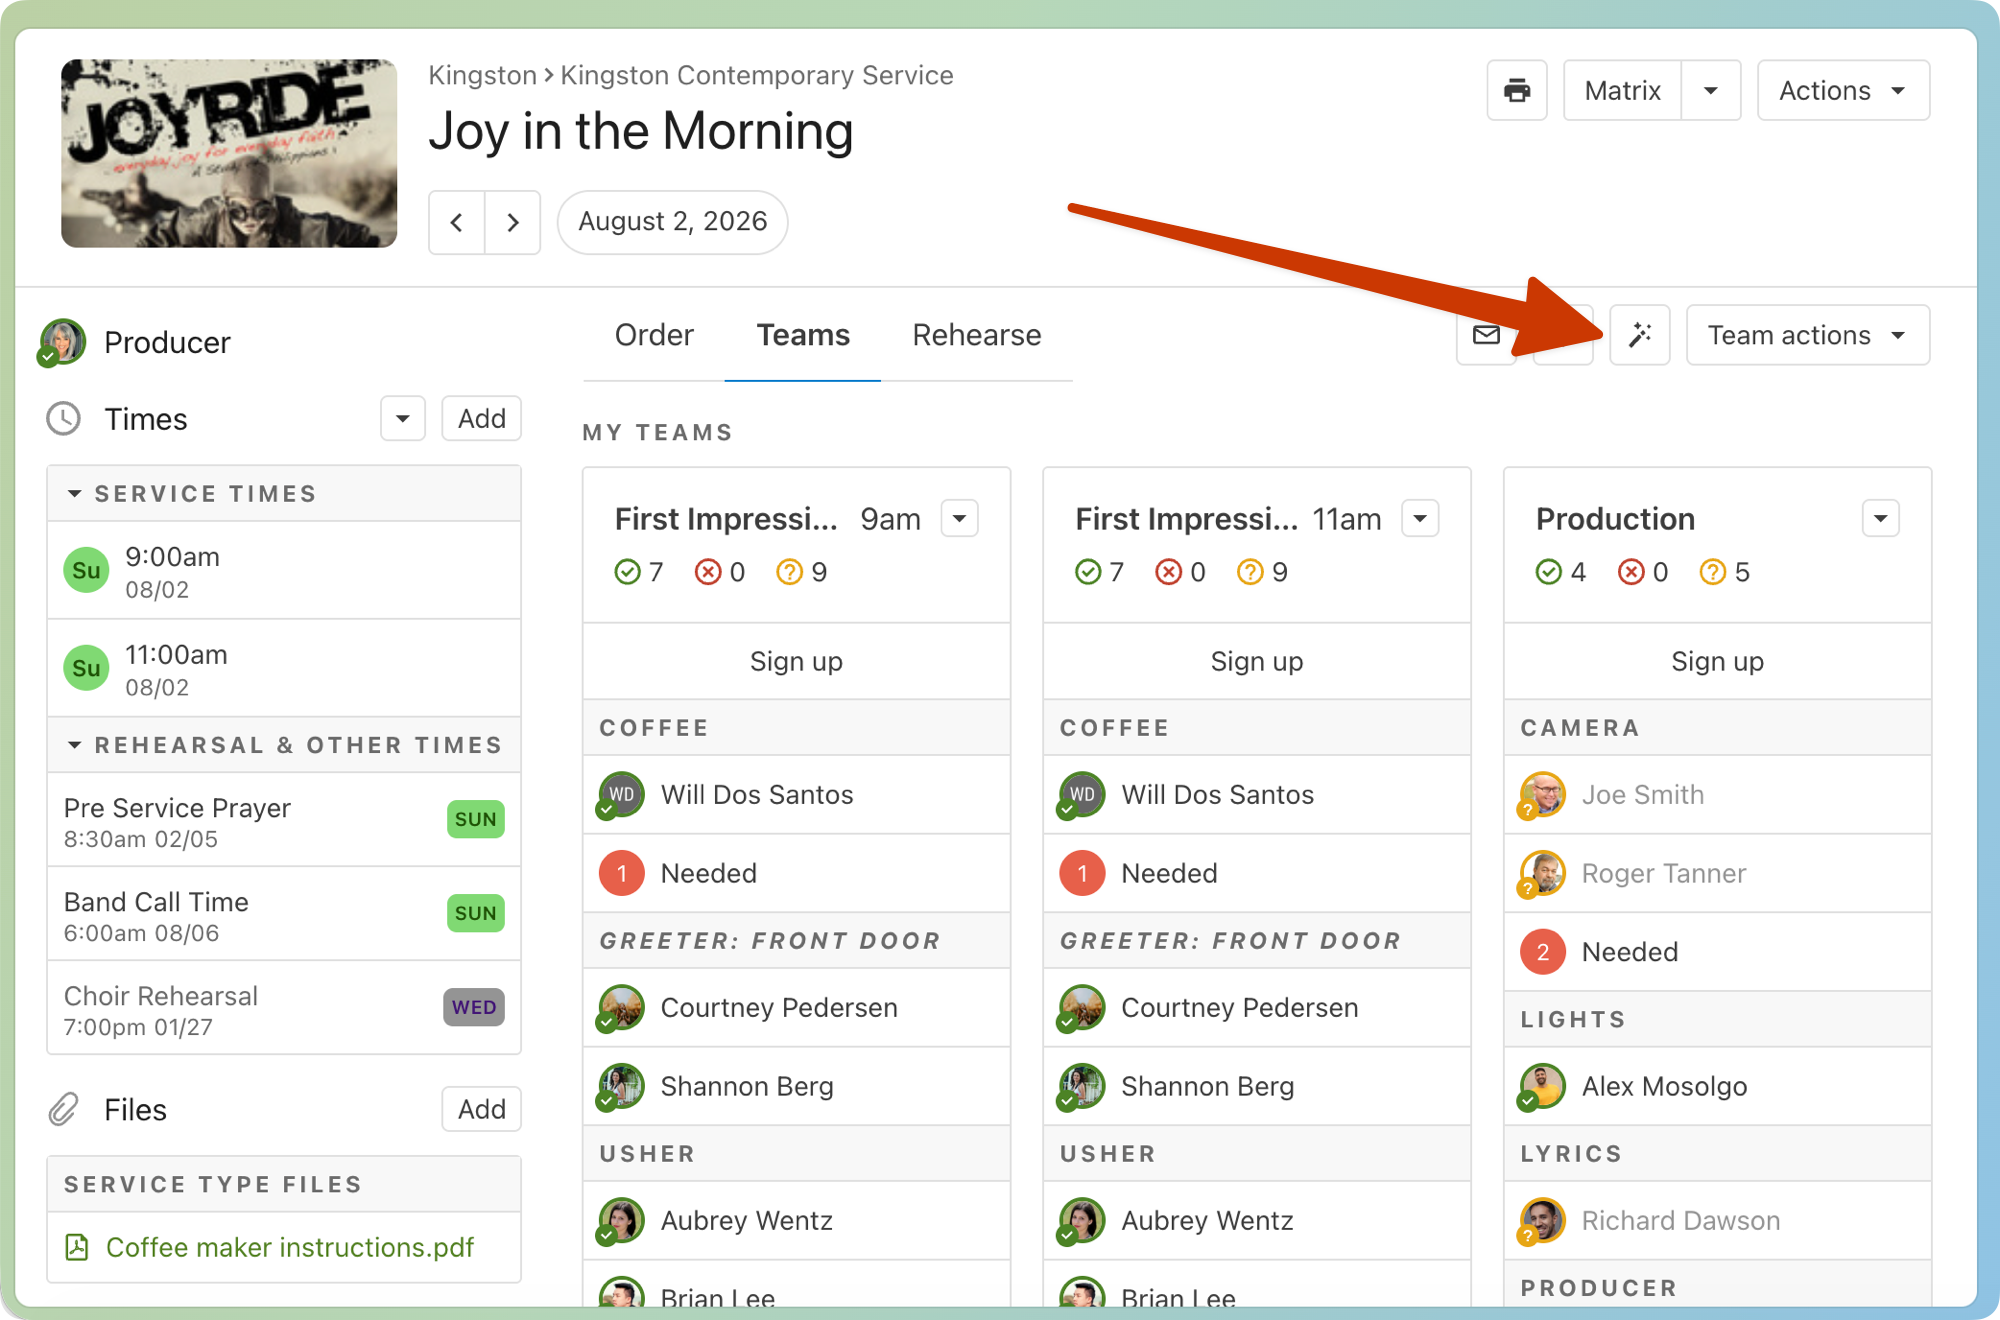
Choose which teams you'd like to auto-schedule in the popup.
If you are a scheduler, the teams you lead will automatically be selected.
If you have editor permissions or higher, select Add to auto-schedule additional teams.
Select the X next to a team's name to exclude it from the auto-scheduler.
Select Submit to run the auto-scheduler.
Warning
The auto-scheduler won't fill a position if everyone has a scheduling preference, conflict, or blockout date.
Undo auto-scheduling
If the auto-scheduler didn't give you the desired results, you can undo the assignments before leaving the plan page. Once you leave the plan page, undo will be unavailable. To undo the assignments:
Stay on the plan page after running the auto-scheduler.
Select the 🪄auto-schedule icon in the top right.
Select Undo Auto-Schedule of [number] People in the bottom left of the popup.
All the people you just scheduled will be undone, and then you can make any changes before re-running the auto-scheduler.
Auto-schedule multiple plans
Set up a matrix view to auto-schedule multiple plans at once!
Select the Plans page from the top navigation in Services.
Select the Matrix button to the right of the service type you want to schedule.
Select the date range at the top to adjust the plans you need to auto-schedule. You can also pull up a custom matrix view if you've already set one up.
(Optional) Adjust your needed positions for the selected plans:
Hover over a plan column and select the arrow that appears above the scheduled teams.
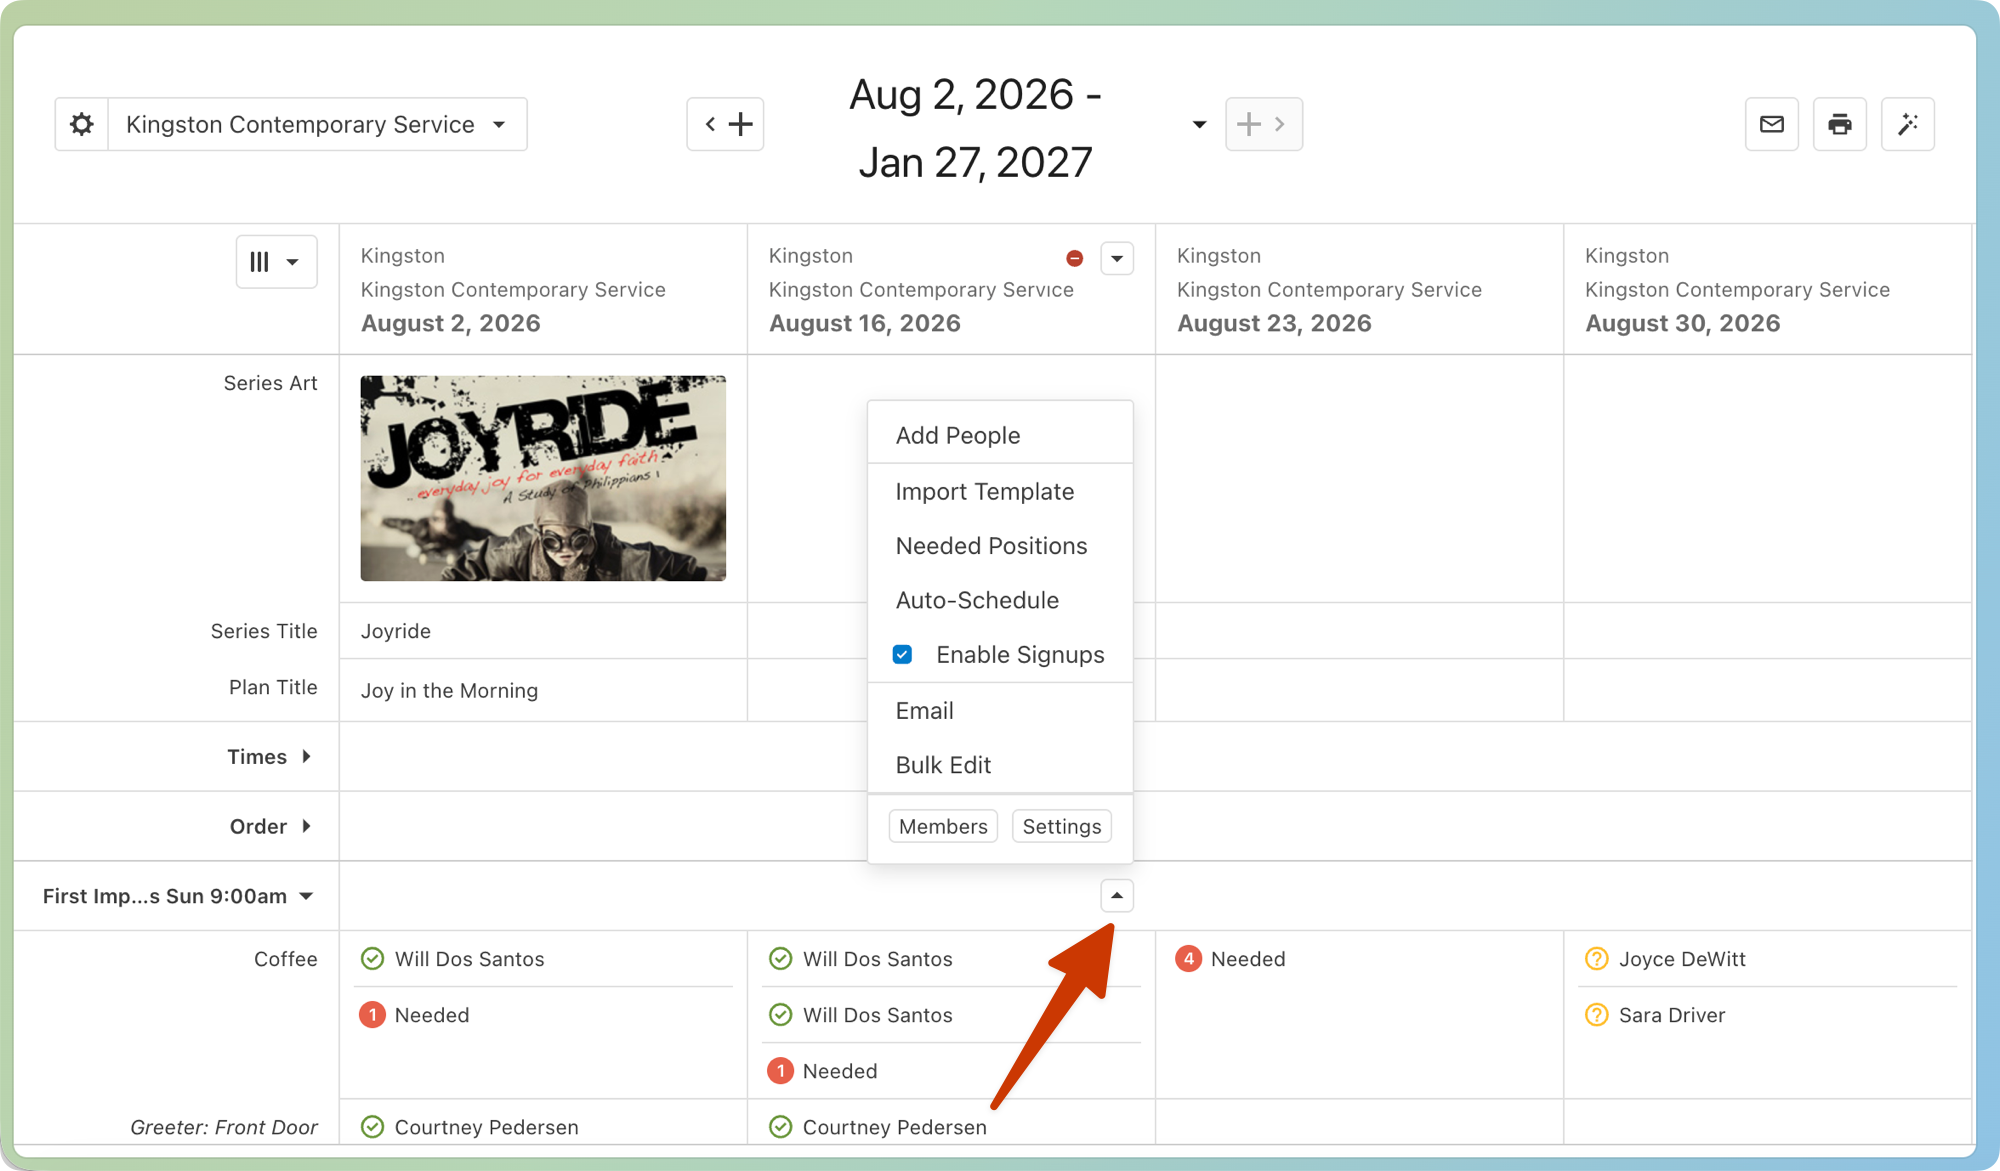
Choose Needed Positions from the popup menu.
Select the plus and minus (+/-) icons to choose how many people need to be scheduled for each position.
Select Done at the top of the plan column.
Select the 🪄 auto-schedule button in the top right.
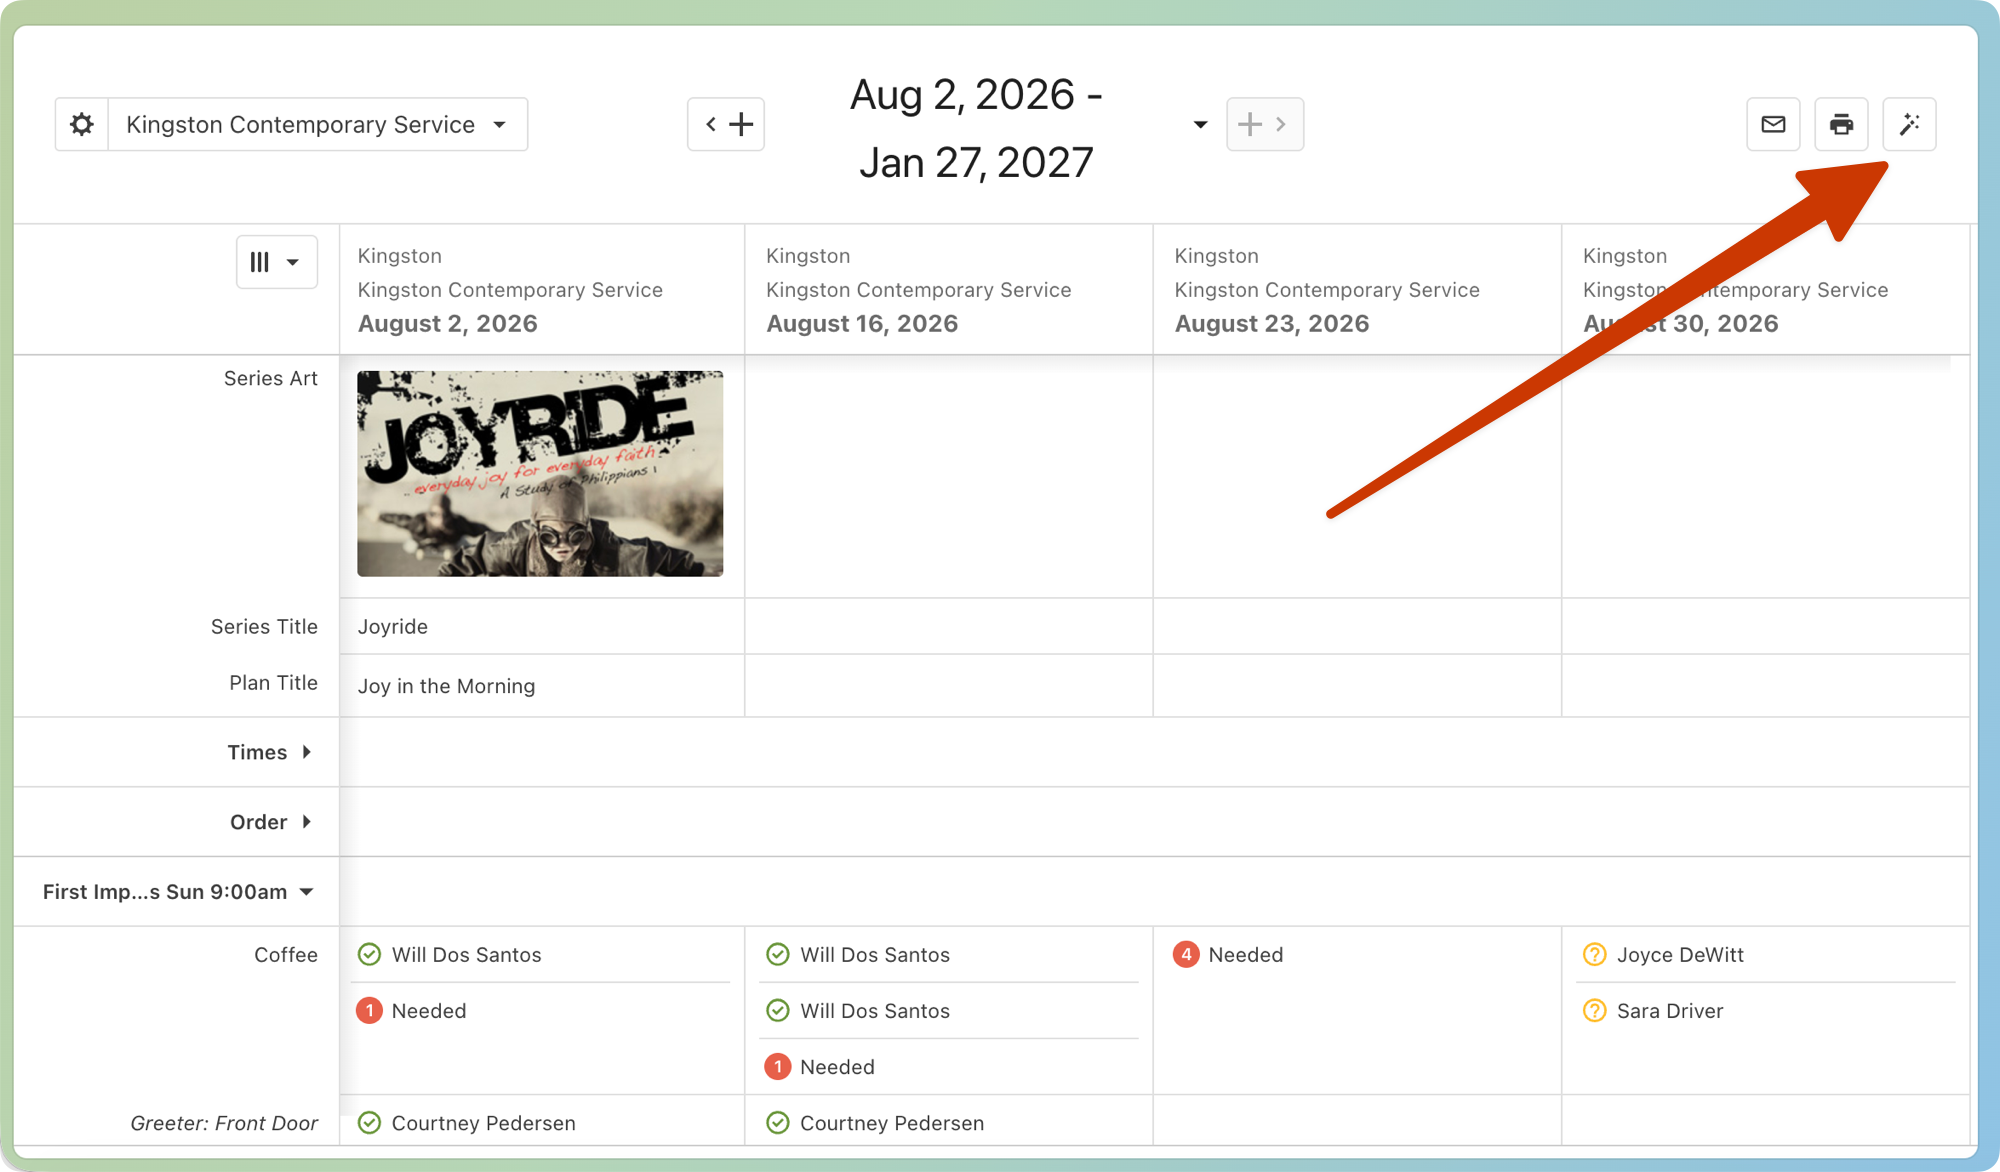
Choose which teams you'd like to auto-schedule:
If you are a scheduler, the teams you lead will automatically be selected.
If you are an editor or above, select Add to add other teams to the auto-scheduler.
Select the X next to a team's name to exclude it from the auto-scheduler.
Select Submit to run the auto-scheduler.
Warning
The auto-scheduler won't fill a position if everyone has a scheduling preference, conflict, or blockout date.
Undo auto-scheduling in the matrix
If the auto-scheduler didn't give you the desired results, you can undo the assignments before leaving the matrix view. Once you leave the matrix, undo will be unavailable. To undo the assignments:
Stay on the matrix page after running the auto-scheduler.
Select the 🪄 auto-schedule button in the top right.
Select Undo Auto-Schedule.
All the people you just scheduled will be undone, and then you can make any changes before re-running the auto-scheduler.