Set up Registrations
Registrations is the place where you'll create signups to collect registrations and online payments for events. Follow the steps in this guide when you're ready to set everything up so you're ready to go!
Important
If you plan to collect online payments through Registrations, make sure Planning Center Payments has been set up. While you won't be able to accept online payments until this is complete, you can still create signups and record cash or check payments.
Create a signup
The very first thing to do after opening Registrations for the first time is to create a signup by selecting New signup in the middle of the page. Follow along with the steps in Create a signup to create one.
Each signup you create can be found on the Signups page in Registrations. From here you'll see an overview of each signup, including the name, date of the event, number of attendees registered so far, and the signups' visibility and registration status.
Create categories
Categories allow people to filter signups on Church Center. Before categories are available for filtering, you need to create them. Create your first category by following the steps in Add categories.
Adjust Church Center settings
You can control how signups are displayed on Church Center from the Church Center dropdown on the Signups page in Registrations.
Select the Signups page in the top navigation in Church Center.
Select the Church Center dropdown.
Select Update settings.
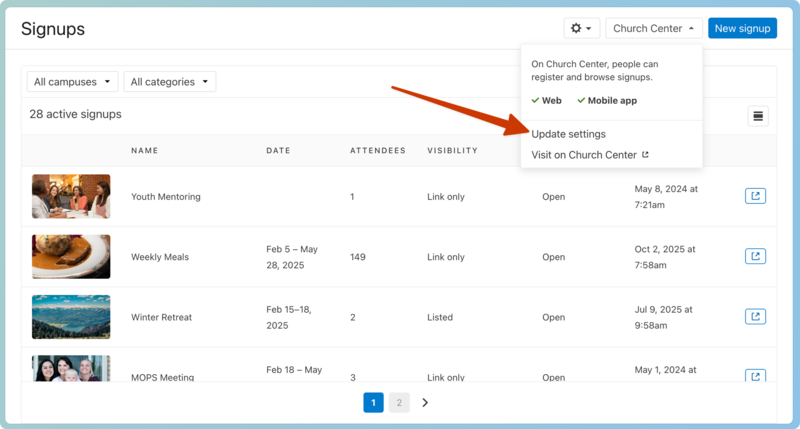
Choose how you'd like signups to be displayed from the following options:
By date, with undated on top
By date, with undated on bottom
Alphabetically by title
Featured signups will always display at the top of the list, regardless of the setting you choose.
Next steps and additional resources
Now that Registrations is set up and you've created your first signup, check out these resources to help you get going on the right foot: