Team leader tools
After you've created your teams, set a team leader, and assigned team members, you can set scheduling preferences, assign split team times, and email teams from the team's member list.
To access your team's member list:
Select the People page from the top navigation in Services.
Select the Teams tab to view all of your organization's teams.
Use the dropdown in the top left to filter the list by My Teams (teams where you're a leader or member), All Teams, Archived Teams, or specific service types.
You can also search for a specific team by name using the search bar.
Select a team name to open that team's member list.
Set scheduling preferences
If you know your team members' scheduling preferences, you can update them from the position list. If you try to schedule someone to a plan that does not adhere to their preferences, you will see conflict warnings that can help you decide if you'd like to schedule someone else instead.
Hover over the Preferences column in a person's row, select the ✏️ edit icon next to their current preference, and then choose the new scheduling preference.
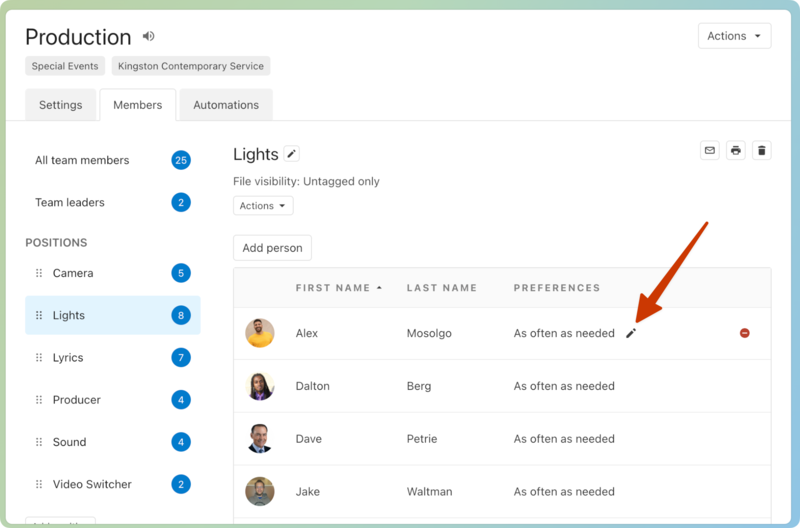
If you want to assign the person to specific weeks, like the 1st and 3rd weeks of the month, select Choose Weeks, and then select the specific weeks.
Assign and filter split teams
You can set time assignments for each person on a split team.
Hover over the person's name, select the ✏️ edit icon, and then assign the time that the person wants to serve.
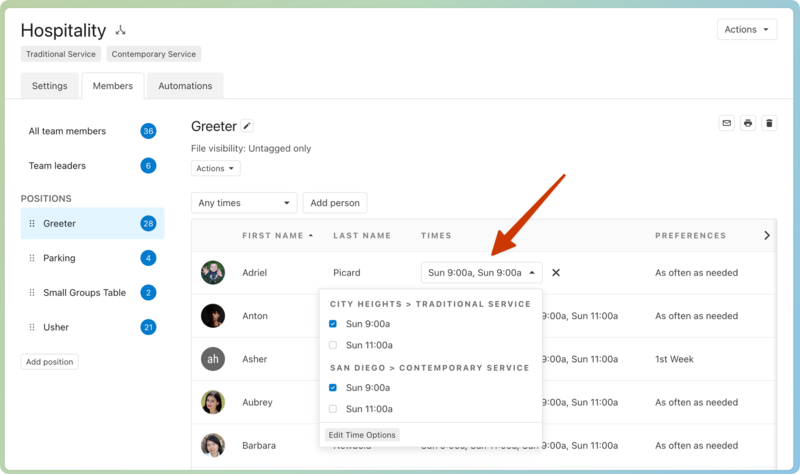
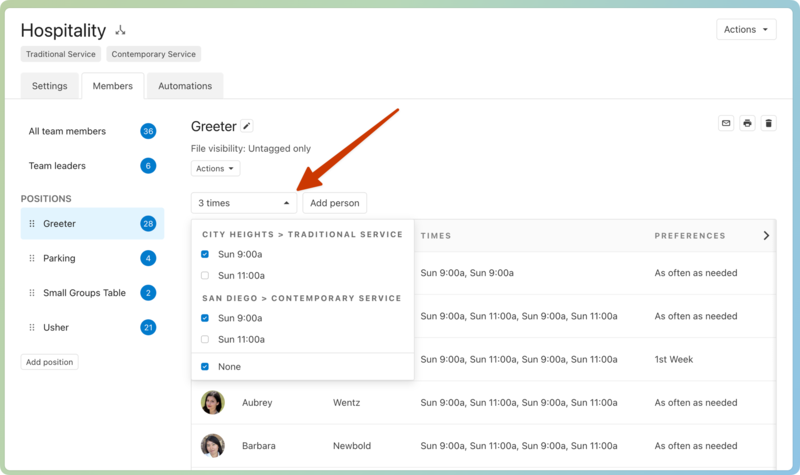
You can filter a list of split team members by time assignments from either the All Team Members tab or a specific position list.
Select the time filter, then choose the time assignments that you want displayed.
Tip
If you filter your team to a specific time, adding a person will automatically assign them to the times in that filter
Email team members
You can email team members from the All Team Members tab or a specific position list.
To email only people assigned to specific times on a split team:
Select the All Team Members tab or a specific position from the left sidebar.
Use the time dropdown at the top to filter the list for the people you want to email.
Select the ✉️ email icon in the top right.
Choose the email template and edit the email as necessary.
Select Send.
If you need a printed list of your team, use the filters to find exactly the group you need and then select the 🖨️ print icon at the top right.
Leader notifications
If a leader is set as the replies to person in the team settings, they can choose whether to receive notifications whenever team members accept or decline scheduling requests. Any team leader can choose to receive notifications when team members add blockout dates.
From the team's Members tab, select Team leaders in the left sidebar. Use the checkboxes in the Notifications column to set which notification types each leader should receive.
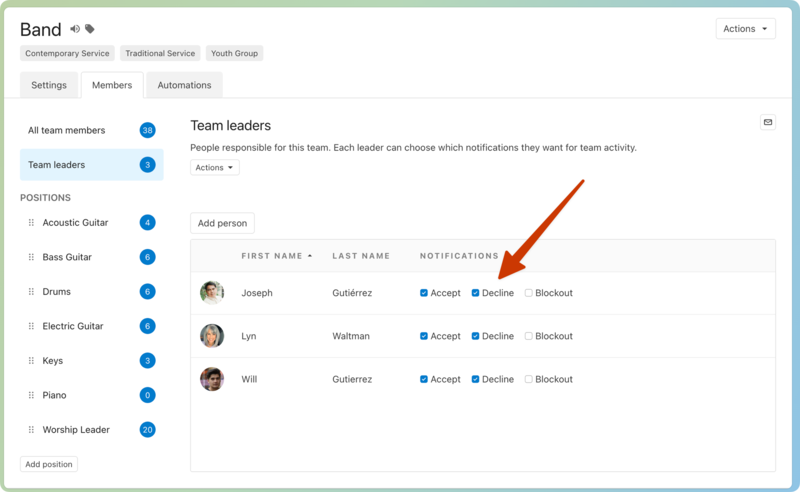
Any of these options can be checked for each leader, but the Accept and Decline options only apply if the leader is set as the "replies to" person:
Accept: The leader will receive an email every time a team member accepts an assignment.
Decline: The leader will receive an email every time a team member declines an assignment. The leader will have the option to reschedule the position from the decline email.
Blockouts: If a leader is set to receive blockouts, they will receive an email every time a team member sets blockout dates.
If the person who schedules someone is not a leader of that team, their notification options come from the replies to defaults set on the team settings tab.