Automations in Services
Automations are designed to reduce your team's workload by automating manual tasks, saving you time and effort every time they run.
Create automation
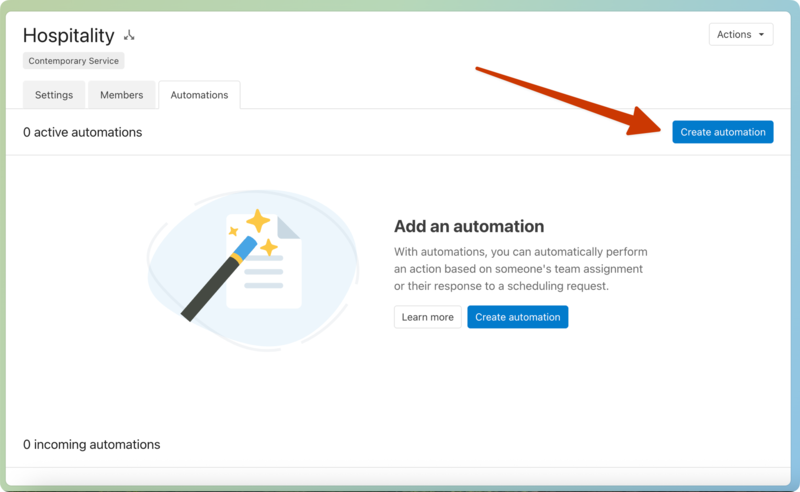
On the Team page, select the Automations tab and select Create Automation.
Set up the automation by completing the fields.
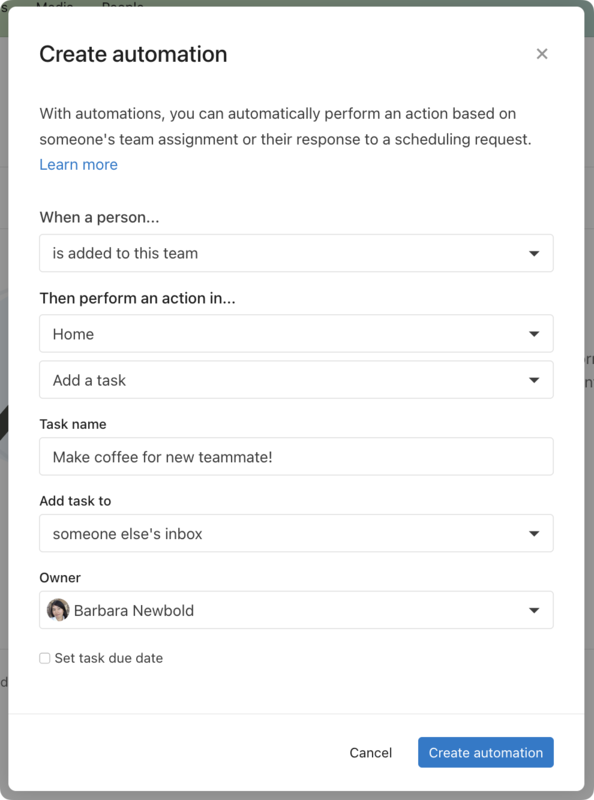
Run the automation when a person is added or removed from the team.
Choose the product and action of the automation. If more context is needed, choose the corresponding information.
Select Create automation to enable the automation.
You can view all automations that will affect your team on the team's Automations tab.
Potential errors for bulk actions or automations
When you apply a bulk action or automation, the action will attempt to import anyone who has not already been imported into Services. Once the person is imported, the action will then be applied.
However, a couple of things can cause the import to fail.
If importing a person to Services causes you to exceed the number of people in your package, the import will fail.
To fix this, an Organization Administrator can upgrade your package, or you can archive team members.
An Administrator can require specific tags on a person's profile. Since a bulk action can only perform one action at a time, attempting to import new people will fail if there are required tags.
To fix this, an Administrator can temporarily edit the tag group so that it is not required. They can then use the tag group filters within Services to identify everyone who does not have a tag from that group and correct it.
Pause or delete automations
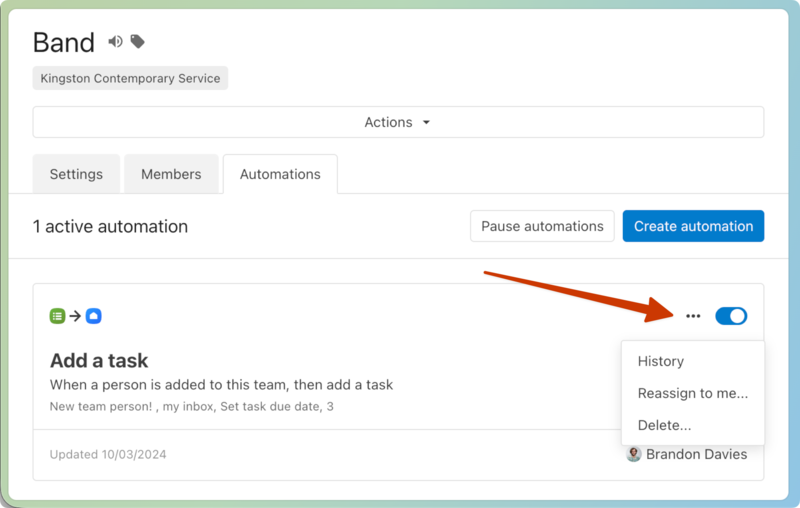
Use the toggle slider to pause an automation that you don't want to run.
To pause all your automations, select Pause automations in the top-right corner.
To delete an automation, select the three dots next to it, then choose Delete.
View automation history and reassign automations
You can view an automation's history for the last 32 days, reassign it to yourself, or delete it by selecting the three dots in the top right corner of the automation.
You may see the following statuses when viewing an automation's history.
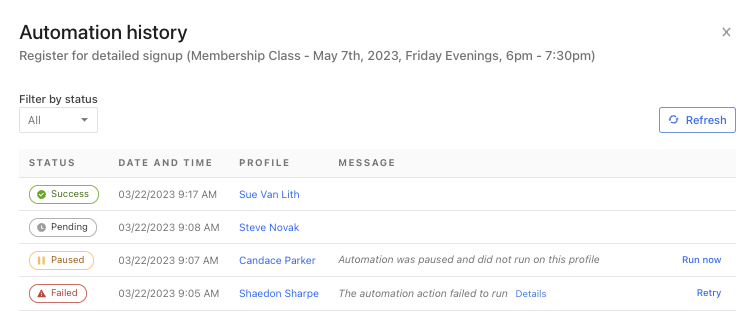
Success: The automation ran successfully on the person.
Pending: The automation is still in process.
Paused: The automation was paused before the last action that would have normally triggered it, so it did not run. Select Run now to run the automation.
Failed: The automation failed to complete. You can select Details to find out why the automation failed. Select Retry to try the automation again.
Tip
The owner of the automation will receive an email notifying them of the failure.
If an automation has any errors or instances skipped due to being paused, you will also see an indicator on the automation showing the number of paused or failed instances.
If you ignore a failed or paused automation instance, it will show up on the Automation history page with an Ignored status. It will not be included in the number of errors or paused items on the automation.
Common automations
Check out the example below to see how other churches are using automations in Services.
Add a team member to a group
If you use Groups to connect with your Services team members, you can set up an automation that adds someone to a group whenever they're added to the corresponding Services team.
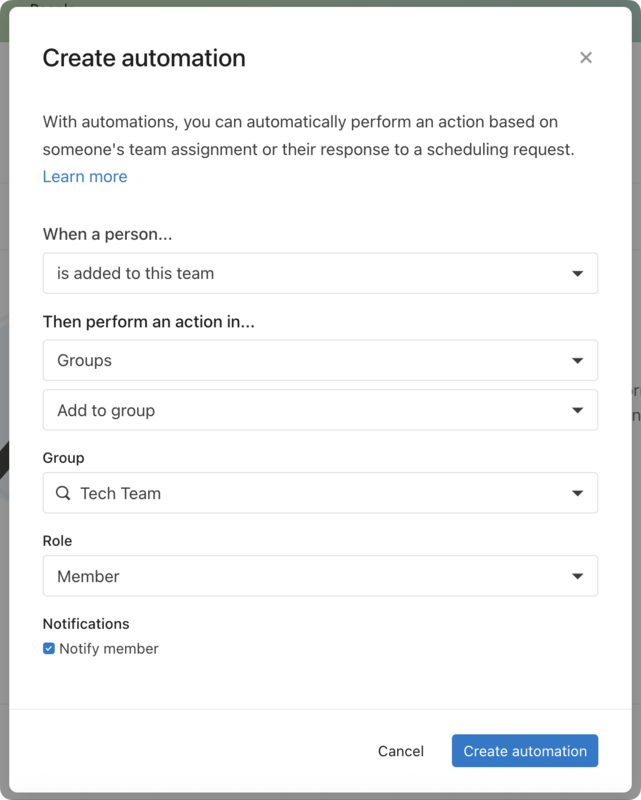
Tip
If you check the Notify member box, the team member will receive an email stating they've been added to a new group.
You can also create the other side of this automation: when someone is removed from a team, set the automation to remove them from the group.
Automate creating and assigning tasks
A lot is going on at your church, and that means tasks for your staff! Instead of manually tracking these actions, you can automatically create and assign tasks.
Create an automation to add a task from the Automations tab.
When a person...: Select the activity that triggers the task automation.
Then perform an action in...: Choose Home as the product and Add a task from the dropdown.
Task name: Name your task.
Add task to: Select where to add the task.
Owner: If you're adding the task to someone else's inbox, search for that person's name. If you're adding it to a specific task list, select the list from the dropdown and add an assignee.
Days after task is created: If the task should be completed by a particular date, enable Set task due date and add the number of days before the task is due.
Once the automation runs, the assigned task appears in the assignee's inbox or task list, and they are notified of a new task. At the bottom of the task, the assignee can see who made the automation.