Create custom reports
If the standard reports included in Services don't meet your needs, an administrator can create a custom report. We have many sample reports that most anyone can personalize using quick customizations.
Important
For a fully customized report, you'll need a good knowledge of HTML, CSS, and some basic programming knowledge.
Check out this video about how custom reports work.
Create a new report
People and plans administrators can create or edit custom reports on the Reports page.
Select the People page from the top navigation in Services.
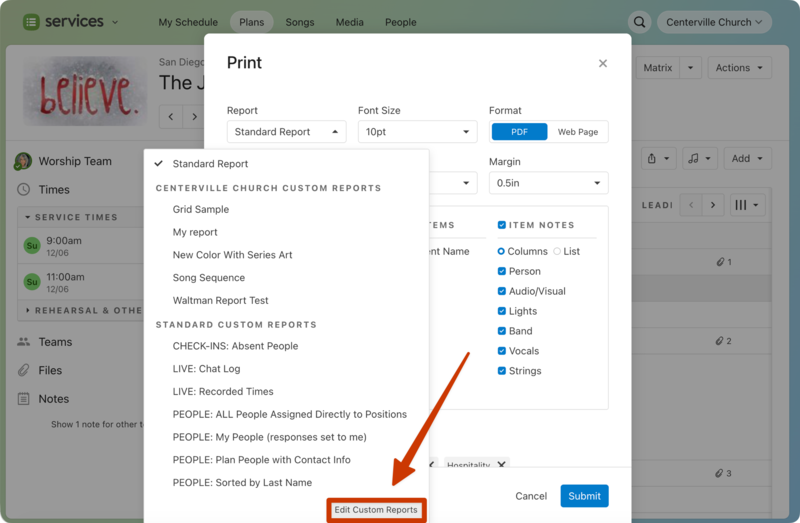
Select the 🖨️ print icon at the top of the people list.
Select ✏️ edit custom reports in the top right of the Print Report popup to open the Reports page.
The Reports page lists all previously created custom reports in your organization, and is separated by report type (Plan Reports, Matrix Reports, People Reports).
Select the ➕ Create a report button below the type of report you want to create
Plan Reports can be printed from any plan using the information available in that plan.
Matrix Reports can be printed from the Matrix using information available in any plans loaded in that Matrix view.
People Reports can be printed from the main People tab using most of the information available on each person's profile.
Enter a name for your report at the top of the New Report page.
Choose a the template you'd like to use as a starting point. The available template options depend on your chosen report type.
Select Create report to open the report editor.
You can also open the Reports page by selecting Edit custom reports at the bottom of the report selection dropdown while printing a plan report or matrix report.
Edit the report
In the report editor, you can use Quick Customization to change the type of information that displays in the report, edit formatting, and use Advanced Editing tools to make further customizations.
To preview the report as you make changes, open another tab in your browser so you can code in one tab and preview in another.
To open the preview in a new tab:
Open another tab in your browser.
Select the 🖨️ print button in a Plan, Matrix, or People page, depending on what type of report you want to view.
Select the report you want to edit from the Select Report dropdown.
Select Web Page from the Output As dropdown.
Select Submit.
Now you can keep the editor and preview tabs open as you edit. After editing and saving the report in one tab, refresh the preview tab to see your changes.
Edit using quick customization
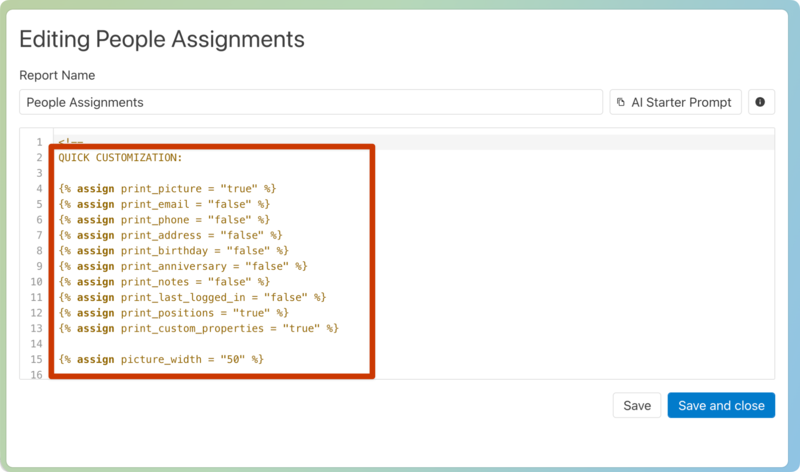
The Quick Customization section at the top of the report gives you options that you can edit.
There are three different types of variables that you can edit from the Quick Customization section:
True or false
Contingent settings
Choose your variable
True or false
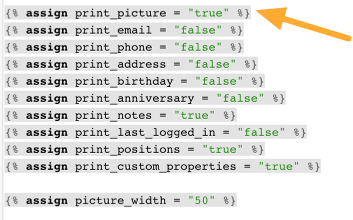
In the example below, the picture, notes, assigned positions and custom properties (tags) will be printed in the report. The email, phone, address, birthday, anniversary, and last login will not be printed.
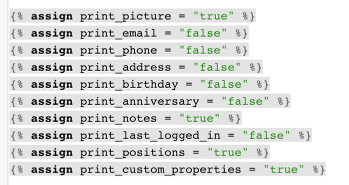
If, for example, you want to change the report to show people's email, you can change print_email to "true".
Contingent settings
Sometimes a setting is contigent on whether or not something else is set to true or false.
In our example, print_picture is set to "true", so you will want to pay attention to the picture_width setting further down on the page. This setting won't apply if you print_picture is set to false.
Choose your variable
Sometimes you will have the opportunity to select the variable from a list of items.
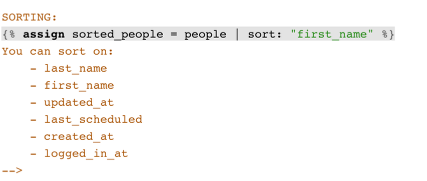
In the following example, the person's first name is chosen as the value to sort the list by, but you can change that to anything on the "You can sort on:" list.
Important
Enter your variable names exactly like they are titled in your plans, including capitalization and spacing. If your category names aren't exact, they won't print.
Select Save & close or Save at the bottom of the window to save your report.
Customize formatting
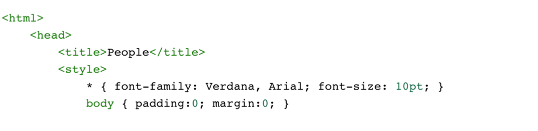
You can also customize the formatting of the report using basic HTML tags.
For example, you can change the font type and size within the <style> tags.
Advanced editing
If you have experience with liquid programming, you can customize your reports even further.
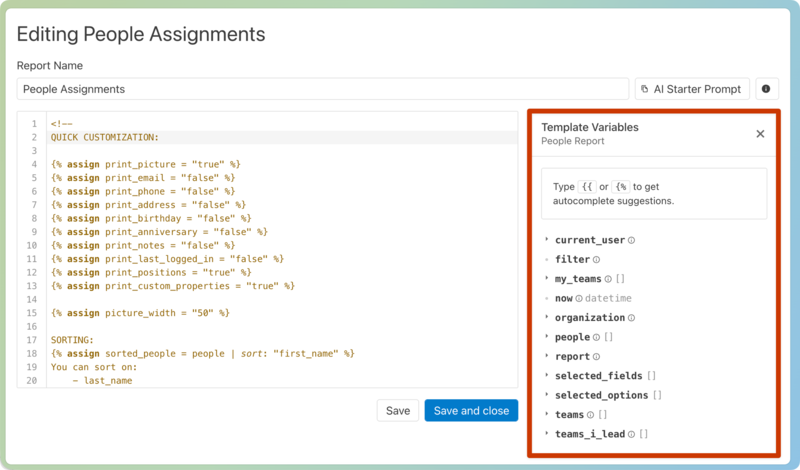
Select the AI Starter Prompt button in the top right to paste the report code into your preferred AI chatbot so you can get help editing this template.
Select the ℹ️ information icon in the top right to learn more about liquid programming and view the available variables for this template.
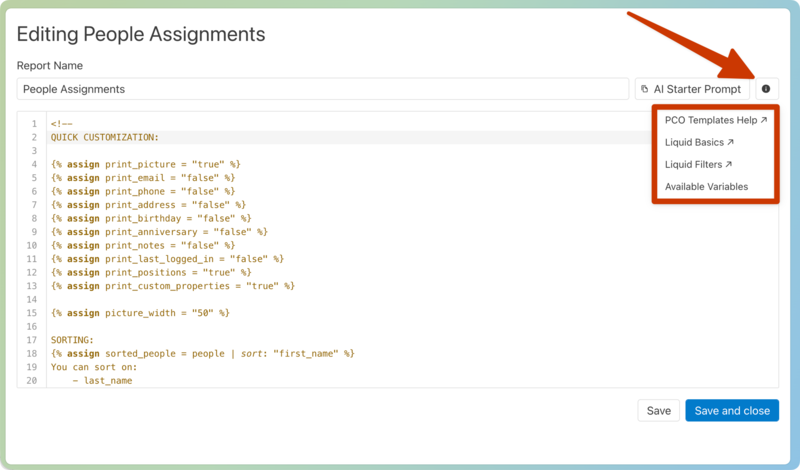
PCO Templates Help: Choose this option to open the custom report article while editing your report.
Liquid Basics: Learn more about the basics of liquid programming.
Liquid Filters: Learn more about how to use liquid filters to modify your report.
Available Variables: Choose this option to open the Template Variables menu, which lists all available variables for the template type you're editing. Hover over a variable and select the ➕ plus icon that appears to add that variable to the editing window.