Show events at a kiosk
Set up a kiosk to show people a live preview of what's happening that day! The kiosk view is designed to be displayed on TVs, monitors, and tablets around your building. Kiosks show the name of your organization, the date, the current time, and upcoming events.
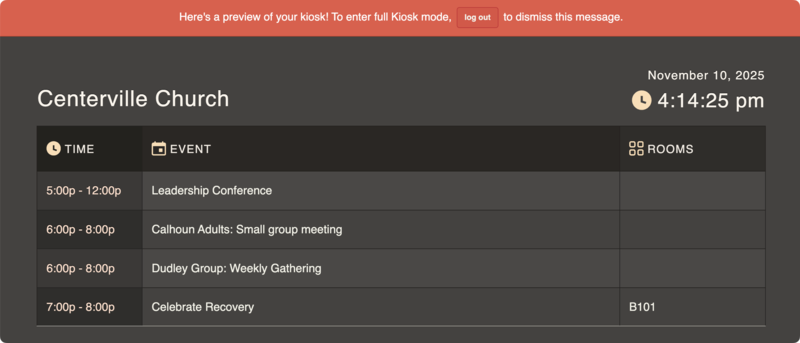
Your upcoming events' information appears in the following order:
Time listed on the event
Event name
Name of the time if it doesn't match the event name
Rooms selected to show on the kiosk in the order listed on the event
The kiosk refreshes events every five minutes. Once an event ends, it's removed from view.
Important
Kiosks only show fully approved events.
Launch the kiosk
Select the Events page from the top navigation in Calendar.
Select the Share icon in the top right.
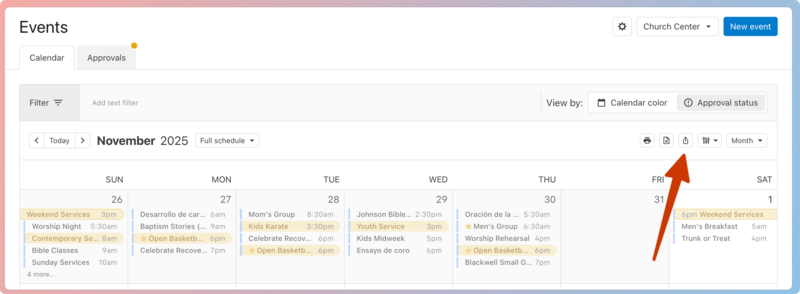
Choose the Kiosk option.
Select Continue.
Choose which filters to apply to your kiosk:
Filters from your calendar: Any filters applied to the Events page before selecting the share icon are automatically applied to your kiosk. Select the X next to a filter to remove it.
Tags: Search for a tag filter and select it from the list to apply it to your kiosk.
Rooms and Resources filters: Filter kiosk events based on their requested rooms and resources. Search for a room or resource and select it from the list to apply the filter, or select Browse to look through your organization's rooms and resources.
Church Center filters: Choose whether to filter your kiosk events by their Church Center visibility status.
Feeds to include: If you use Registrations or Groups feeds to sync events, choose which feeds to include in your kiosk. Select the X next to a feed to remove it from the list.
Choose whether to include event descriptions.
Choose whether to show the Full schedule or Public times only.
Select Continue.
Choose whether to launch the dark or light kiosk.
Select Launch to preview the kiosk.
If you want to use your current device as the kiosk, select log out from the top banner. If you'd prefer to use a different device, copy the URL from the address bar and open it on the other device.
Expand the sections below for examples of different types of kiosks you can use.
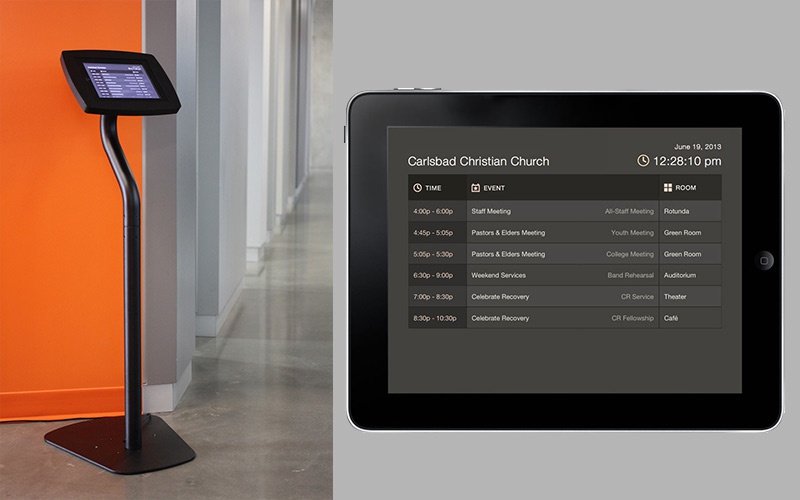
The iPad has built-in Wi-Fi, a crisp display, and a nice black bezel around the edge with no branding. Several iPad kiosk stands are available that prevent theft, provide power, and look great.
Tip
Since Safari and Google Chrome don't have proper full-screen modes, installing a full-screen web browser on the iPad is recommended.
Use the guided access mode and a password so people standing at the kiosks won't be able to use or shut off the iPad while it's displaying your kiosk.
Add a TV as an additional display to a computer or mirror the display of a tablet or computer using an AppleTV or Chromecast.
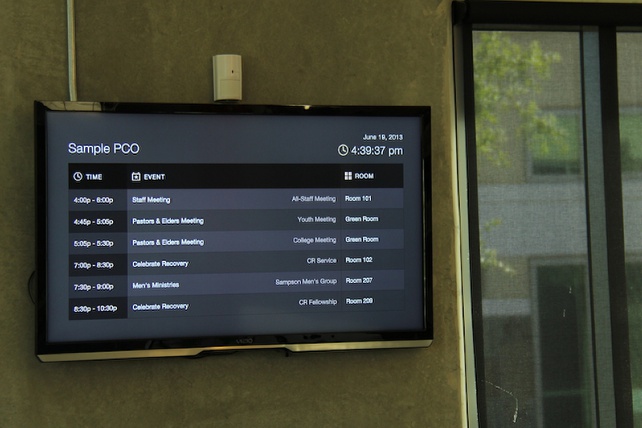
Use one of these ways to set up your TV Kiosk:
TV Display: Set up the TV as a display for a laptop or small computer wired or wirelessly using a wireless HDMI.
Mini PC: Use a small computer that plugs into the HDMI port and is powered by USB. You won't have to have a dedicated iPad or computer for the TV, but you'll need a Bluetooth keyboard and mouse to navigate the computer, set up the initial wifi connection, etc.
Apple TV: Use Apple's Airplay feature to mirror the display of a Mac or an iPad.
Google Chromecast: Plug the device into the USB on the back of your TV. You'll need to add a browser extension to Chrome, and Chrome will recognize the Chromecast devices on your local network. Then, you can select which Chromecast you'd like to broadcast your web browser tab to. Chromecast can only broadcast one device at a time.