Auto-assign team members
If you've been scheduling people to individual plans but have never officially assigned them to a team, you can use the auto-assign feature to scan your previous plans and templates for people you've scheduled and assign those people to your team as members.
Important
The auto-assign feature only works if you have been scheduling people to plans without assigning them to teams. If you haven't yet scheduled people to a plan, first add positions and assign people directly to the team, and then schedule people to the plan.
Select the Plans page in the top navigation.
If you have multiple folders, select the folder that contains the service type you're working with.
Select a plan from the service type you're working with.
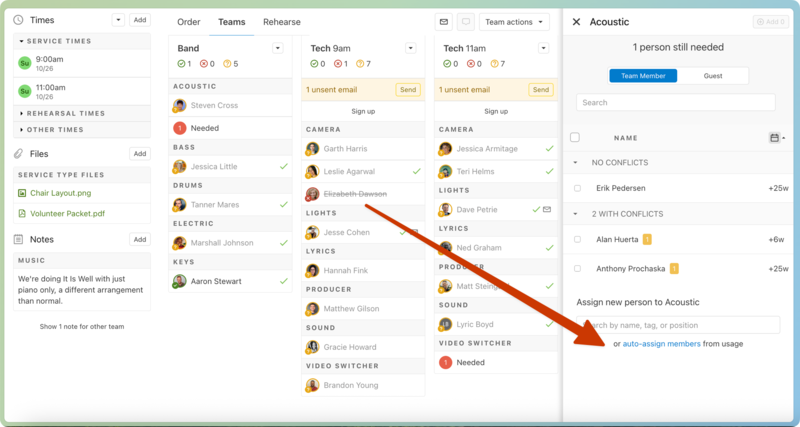
Select the Teams tab.
Select Team actions in the top right.
Choose Add People from the dropdown.
Choose a team from the dropdown at the top of the Add People sidebar.
Select auto-assign members at the bottom of the Add People sidebar.
In the popup, confirm the teams to which you want to auto-assign members:
Select Add to add a team.
Select the X next to a team to remove it from the list.
Set a date range of plans from which you'd like to find scheduled team members.
Select Next: Preview to view a list of scheduled people and positions from the templates and plans included in the date range.
Choose which people and positions you want to auto-assign from the list:
Select the x next to any positions to which that person shouldn't be assigned.
Important
If a person in the list is already assigned to the position shown, removing that position from this popup will not remove them from the existing position.
Select Remove to completely skip that team.
Select Add members to assign everyone in the list to the teams and positions shown.