Item row colors
If there are specific item types you need to be able to find quickly in a plan, you can add colors to the rows for those item types so that you can identify them at a glance.
Want to watch a video before you get started? No problem! This three-minute video will show you the concepts in this article in action.
Edit item row colors
To set custom item row colors, go to the service type settings page:
Select the Plans page in the top navigation.
If you have multiple folders, select the folder that contains the service type you're working with.
Select the ⚙️ settings icon to the right of the service type you're working with.
Choose Settings from the dropdown.
From the Item Row Colors section on the left, you can:
Select Add to add a new item type, and choose its color. Any item with this text in the title will show your chosen color.
Select the ✏️ edit icon next to an item row to change its color.
View custom item row colors
To view custom item row colors, each individual user must edit their plan view.
Select the Plans page in the top navigation.
If you have multiple folders, select the folder that contains the service type you're working with.
Select a plan from the service type you're working with.
Select the Order tab at the top of the plan page.
Select the column button (three vertical lines) in the top right of the service order.
Check the Use custom item row colors box.
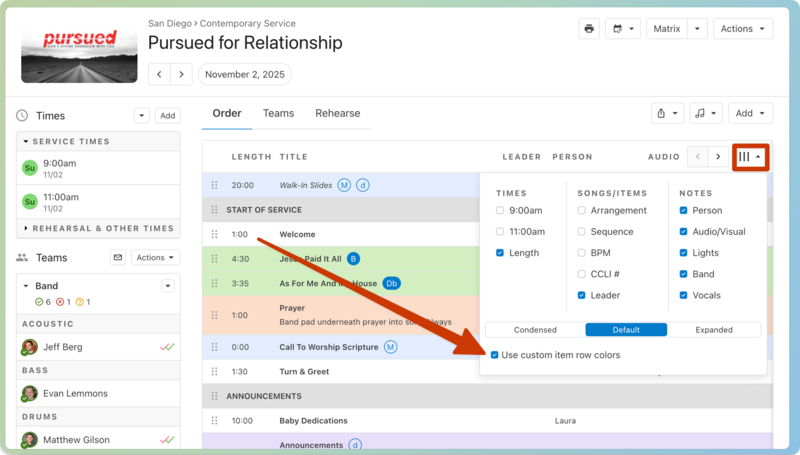
After toggling this setting in one plan, you'll see custom item row colors in all plans in this service type. This setting is stored in your browser.
Group keywords with item row colors
Some churches often repeat elements with slight differences during their services. Use item row colors associated with that element's keyword to identify these similar instances at a glance.
For example, add an item row color for the keyword "Prayer" and start all service prayers with that keyword to make them the same color on the Order tab, even though their titles may vary after the original keyword.