Manage expiring background checks
Depending on your church's policies or local legal requirements, you may be required to re-run background checks for your staff and volunteers. Organization administrators can set an expiration date.
Select the Overview page from the top navigation in People.
Select the Background checks tab.
Select the Settings button at the top of the page.
Select the ✏️ edit icon in the Expiration policy section.
Select the Auto-expire background checks setting.
Choose how many months after completion the background check should expire.
Select Save.
When you change the setting, any background check that is older than the new time frame automatically expires, but if you make the time frame longer than it used to be, previously expired background checks will become valid again.
Expired background checks will not be marked as cleared background checks.
Manual background check expiration
Manual background checks either expire based on your church's expiration policy or on a specific date. You can choose which option is right when creating a manual background check.
When entering a manual background check on a person's profile, select the expiration date from the dropdown.
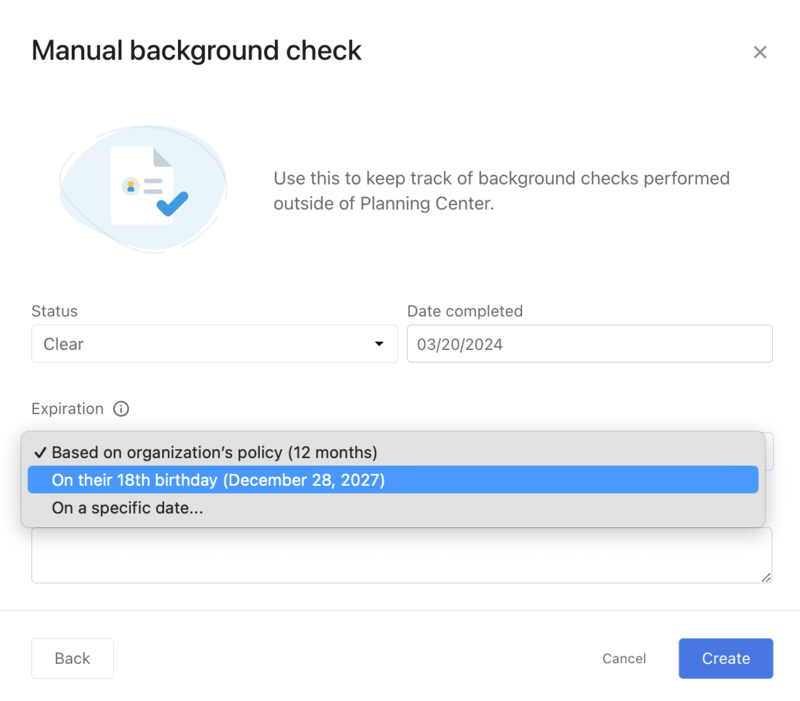
The expiration policy on the Background Checks page does not affect manual background checks with a specific expiration date.
View expiring background checks
Select the Overview page from the top navigation.
Select the Background checks tab.
Select the Expiring soon button to filter the list.
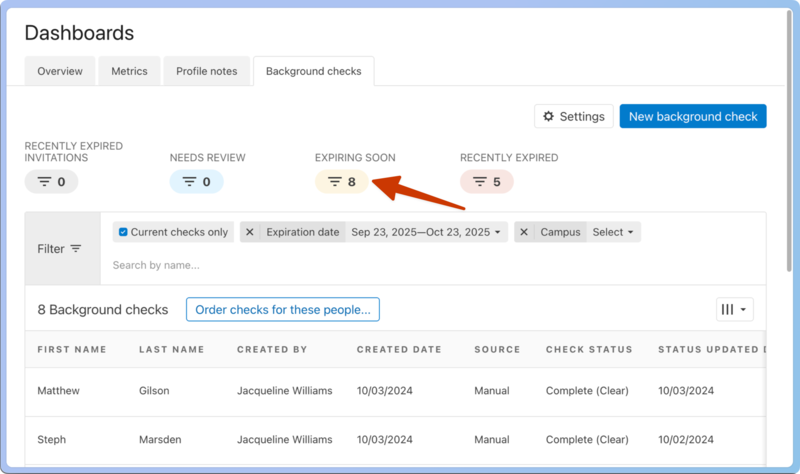
Select Order checks for these people... at the top of the list.
Tip
You can also see whose background checks will expire soon using Lists and create automations to add these people to a workflow to follow up with them before their check expires.