Set up a Zebra printer
You can use Zebra printers with Check-Ins on a desktop when connected via a USB cable, or on a mobile device (if you have a supported model). Check out the video below to connect your printer to a computer and print a test label!
Warning
Zebra recommends using their printers with Windows OS.
Zebra does not provide a driver for Linux/Unix or macOS X, but instead suggests using the Common Unix Printing System (CUPS) driver. Due to the lack of a native driver, printing to a Zebra printer from a Mac computer will not achieve the same clarity and sharpness as with other printer/OS combinations.
Find a supported printer and labels
Printers: Technically, most Zebra printer models should work fine. However, the table below includes a list of printers that have been tested for compatibility with Check-Ins.
Compatible with desktop
Compatible with iOS
Compatible with Android
Not compatible
GX420d
ZD420
ZD421d/421t
LP2844Z
GK420d
ZT420
ZQ620
ZSB series
GK420t
ZQ630
ZQ510
ZD420/421
ZD620/621
ZQ320
You must have firmware V60.14, V50.14, or later for some of the alignment to work properly. To find if your printer is compatible, check Zebra's download and support page and make sure you have the latest firmware.
Important
Windows 11 Users: If you have the ZDesigner version 8 driver, and you are not seeing your printer on your system's Printers and Scanners page, open the Zebra Setup Utilities tool to manage the printer from there.
Labels: Planning Center templates are designed to work only with the 3x2 labels.
Tip
You can order these supported printers and labels from Straight-Line Solutions.
Set up a printer on desktop
Setting up a Zebra printer on a desktop is very involved. Set aside at least 30 minutes to do it correctly.
Important
If you already have a Zebra printer on your computer, uninstall and delete it, then start with a fresh install.
Install printer drivers
Find your operating system in the list below to learn how to install print drivers.
Windows: Type in your model number at https://www.zebra.com/us/en/support-downloads.html and download the appropriate drivers. Proceed to the Rename printer section to continue setting up your printer.
MacOS Catalina: Install a generic Zebra printer driver from the Printers & Scanners area:
Plug your printer into the computer.
Tap the ➕ plus icon to add a printer.
Select your Zebra printer model from the list.
Select Use to choose a driver.
Select Select Software from the dropdown.
Choose Zebra ZPL Label Printer from the list.
Proceed to the Rename printer section to continue setting up your printer.
MacOS 10.13 High Sierra and 10.14 Mojave: Since Zebra doesn't officially support macOS, you must install CUPS by following the three steps below. Once you've completed those steps, proceed to the Enable the Check-Ins printing app section to continue setting up your printer.
Important
Check-Ins does not support macOS earlier than 10.13.
To enable CUPS, you need to install it on your computer.
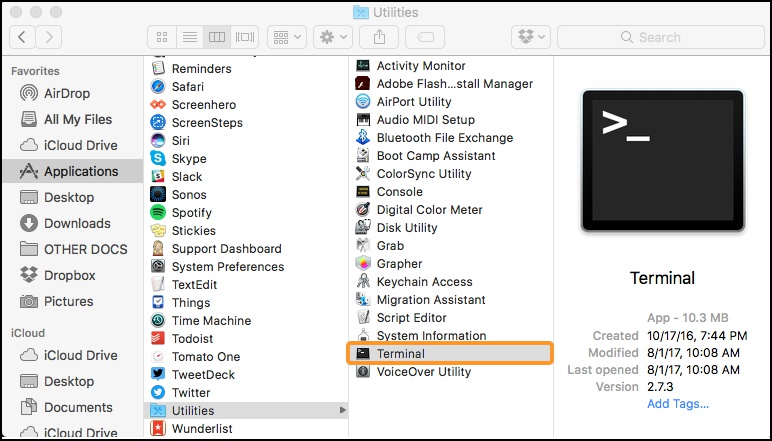
From the Utilities folder in Applications, go to your Terminal.
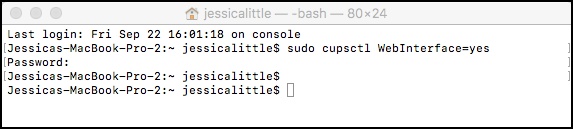
Open the Terminal and type
sudo cupsctl WebInterface=yes. You may also be prompted to enter your password.Once you've entered those two items, go to http://localhost:631/, where you can add the printer and class.
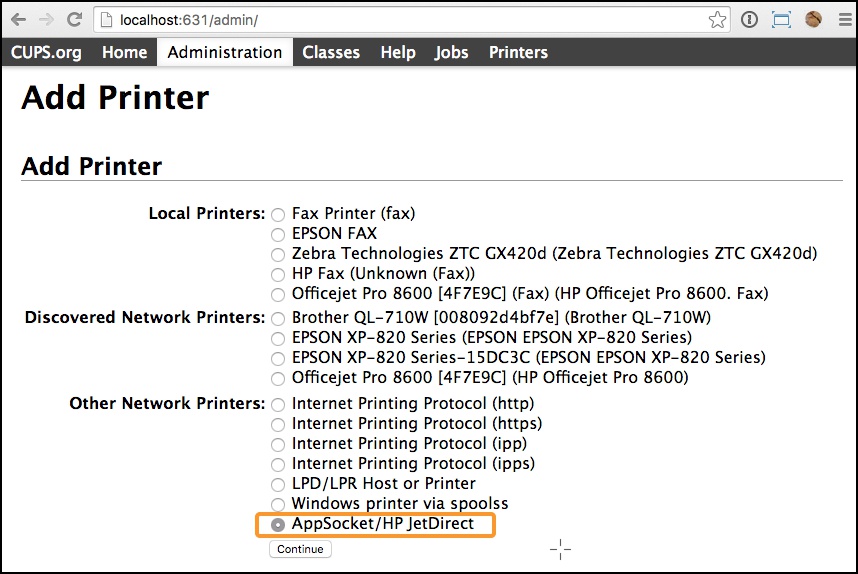
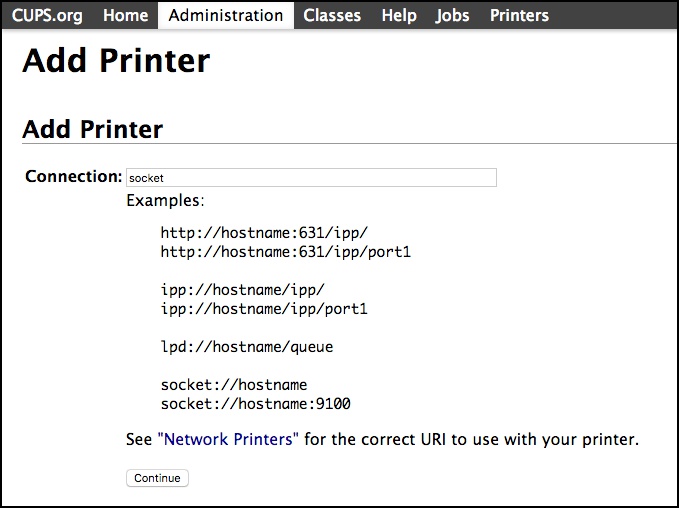
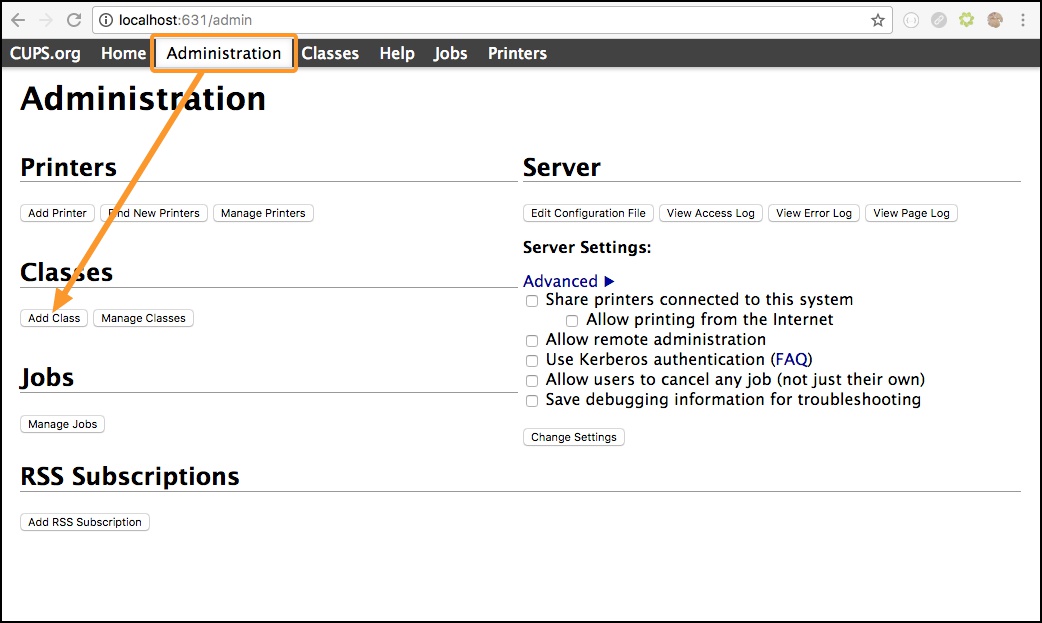
Make sure the printer is plugged into your computer and turned on. Then, go to http://localhost:631/, select the Administration tab, and select Add Printer.

Tip
If you ever need to remove the Zebra printer, select Manage Printers to delete the Zebra printer.
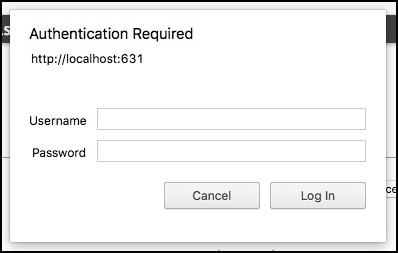
You may be asked to input your administrator name and password to move forward.
Select AppSocket/HP JetDirect, then Continue.
Next, you need to add a connection.
Find the connection by going back into Terminal and typing lpinfo -v | grep usb
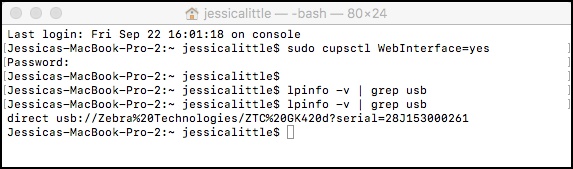
Wait a couple of seconds for your device to communicate with your printer. If your printer is not plugged in, you will get no results.
Copy the connection information from usb://Zebra to the ?.
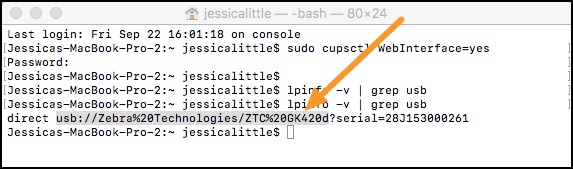
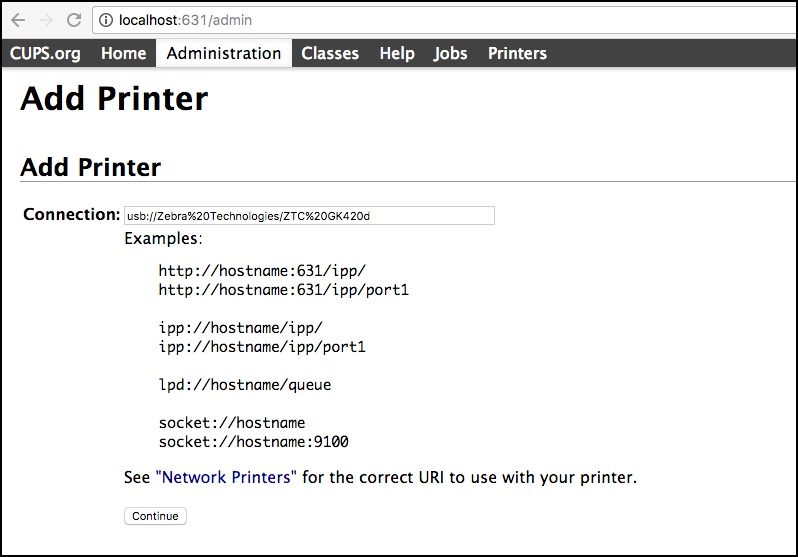
Paste this into the Connection box, replacing any information already in the box, and choose Continue.
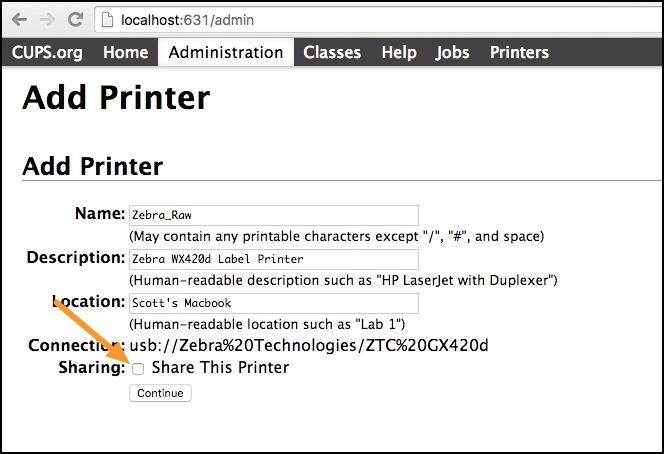
Enter an appropriate Name, Description, and Location for your printer. Uncheck Share This Printer, then select Continue.
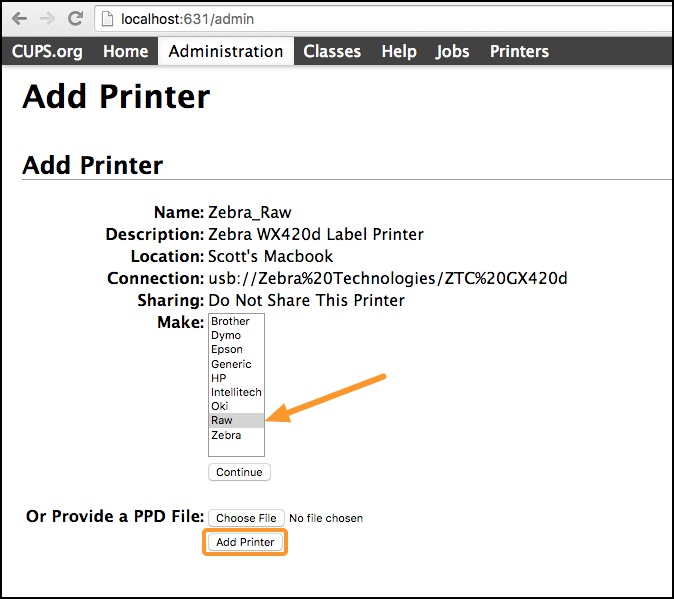
From the Make dropdown, select Raw, then select Add Printer.
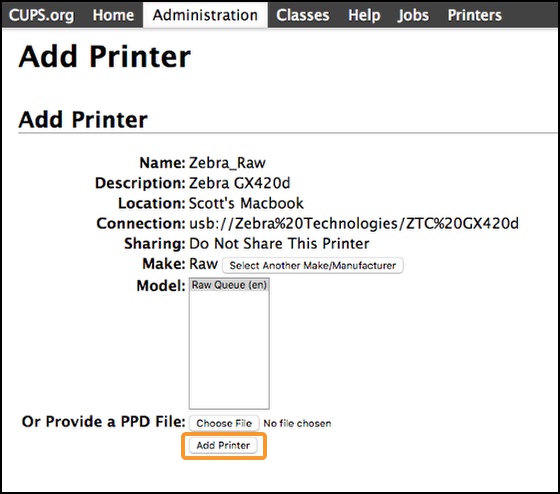
The only option for Model is already selected, so select Add Printer.
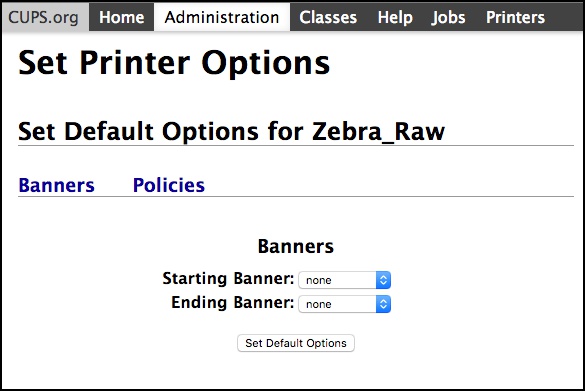
Choose none for both Starting Banner and Ending Banner, then select Set Default Options.
You've finished adding your printer! Now, you need to add the class to finish the setup process.
Go to the Administration page.
Select Add Class.
Enter an appropriate Name, Description, and Location for your class. It must differ from the Printer name chosen previously and include the word Zebra.
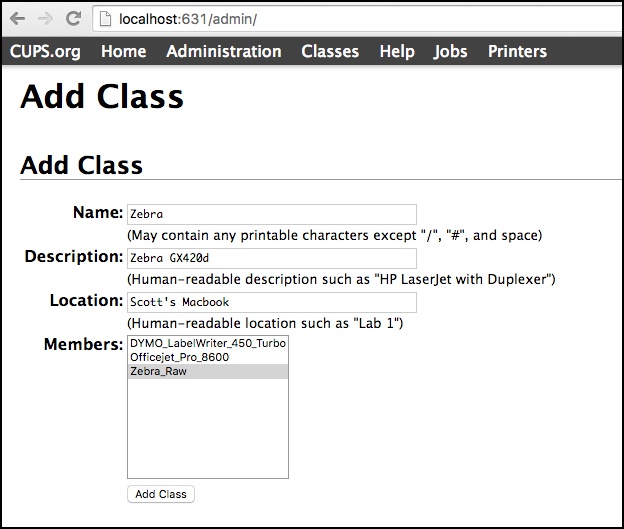
Select the printer you just created and add it to the class by choosing Add Class.
Rename printer
For Check-Ins to recognize your Zebra printer, its name must include "Zebra." If you are on a Mac and went through the CUPS setup, you have already renamed your printer, so you can skip this step!
Open Devices and Printers in your Control Panel or the Zebra Setup Utilities tool if you don't see the printer on that Printers page.
Right-click the Zebra printer, then select Printer properties.
Select the General tab, and add "Zebra" to the name.
Enable the Check-Ins printing app
Planning Center doesn't have direct access to your computer's hardware. To gain access, the Check-Ins app includes the Check-Ins printing app, which works as a widget that translates Planning Center code to the printer.
Download the latest Check-Ins app.
Install and open the Check-Ins app. If using Windows, right-click the app to open and select Run as Administrator.
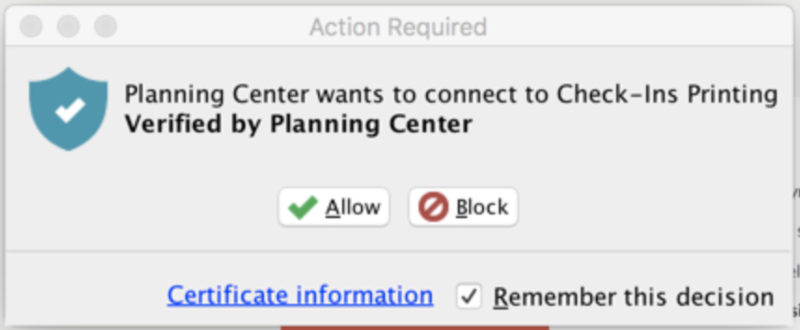
Select Remember this decision, and then select Allow when prompted for the Check-Ins printing app.
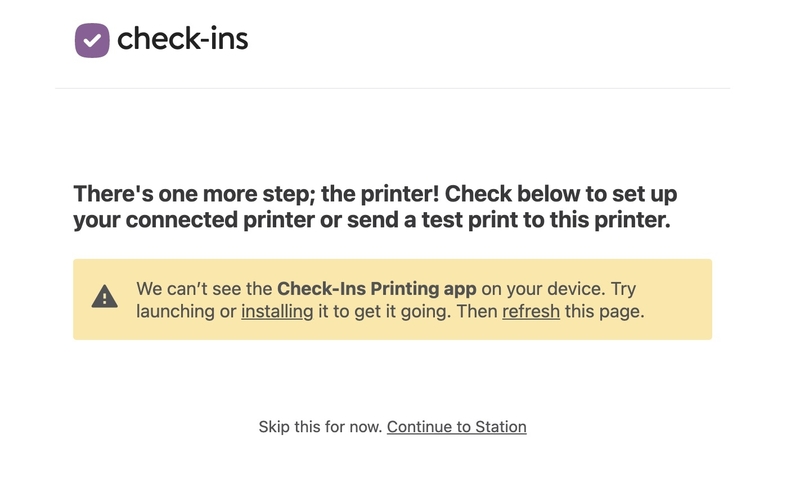
Troubleshoot the Check-Ins printing app
If you see this message, you may need to follow the steps below to delete the printing app's certificate from your computer and reconfigure the permissions.
 |
Look for the Check-Ins printing app in your system tray or menu bar. It looks like a box with a check mark. It might be in your hidden icons.
Select the Check-Ins printing app icon, and then select Advanced Site Manager in the dropdown.
In the Site Manager popup, select the Blocked tab and delete any entries.
Select the Allowed tab and delete the Planning Center entry and any other entries.
Select Close, and then restart the Check-Ins app.
Check Remember this decision, and then select Allow.
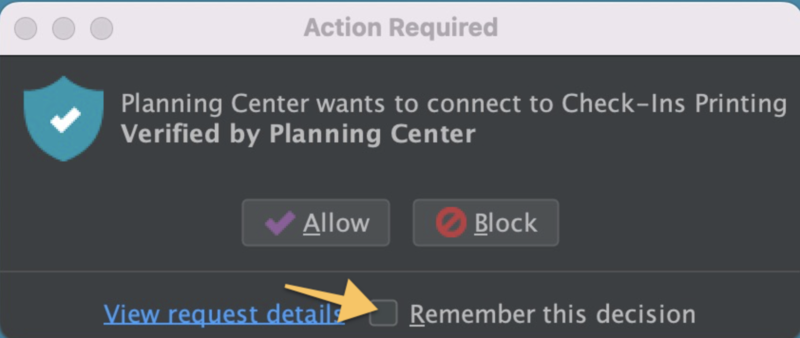
If you do not see this prompt or select Remember this decision the first time, you must follow the steps above to delete the current certificate and get the prompt again.
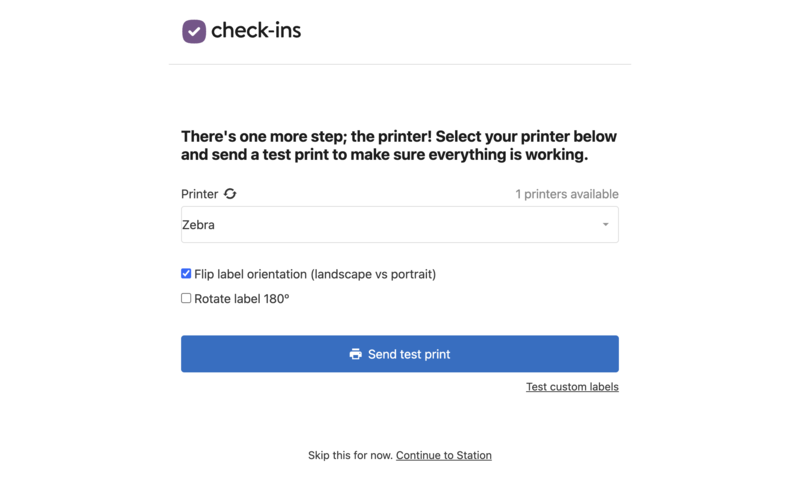
Test print
To make sure your printer is working correctly, send a test print to the printer.
From the Check-Ins app menu, go to Window > Printer Check.
Tip
If you are in Kiosk mode, use a keyboard shortcut to access the Printer Check page (
Ctrl+2for Windows;Cmd+2for Mac).Select Send Test Print.
If testing custom labels, select Test Custom Labels, and then select Send Test Print on the next page. The label will print.
If your label prints in the wrong orientation, check the Flip label orientation (landscape vs portrait) box on the Printer Check page. Adjust the setting as needed and repeat these steps again to test print.
Check out this training video on how to print from your computer!
Set up printer on mobile
If you have a supported Zebra printer that connects via Wi-Fi and Bluetooth, you can connect it to the Check-Ins mobile app!
Wireless connectivity varies for the ZD420/421. Some have Wi-Fi and Bluetooth built in, but others may need an additional wireless module. Zebra Support can help you choose the right one if you are unsure which model you have.
To connect a Zebra printer to your mobile device, follow the instructions that come with your printer or on the Zebra Support website.
After connecting the printer to your mobile device, follow the steps below to connect your printer to the Check-Ins app:
Android
Open the Check-Ins app on your device.
Tap the ⚙️ settings icon in the bottom right corner.
On the Edit Station Settings popup, tap Printer Settings below the keypad.
In the Discovered Printers section, tap Printer Setup to show all discoverable printers or Set Manually to search for a printer using the IP address.
If you tap Printer Setup: Find your printer in the popup and tap it to set it as the default printer.
If you don't see your printer in the popup, tap Search to scan the area again for discoverable devices.
If you tap Set Manually: Select the printer model you want to connect, enter the IP address, then tap Search.
If the printer appears below the IP address section, tap Connect to set it as the default printer.
Once you've selected your printer as the default printer, your changes are automatically saved and you'll be taken back to the Settings page.
Tip
If you're having trouble connecting your printer to the mobile app, you can open the troubleshooting wizard by tapping Troubleshoot on the printer settings page.
iOS
Open the Check-Ins app on your device.
Tap the ⚙️ settings icon in the bottom right corner.
On the Edit Station Settings Key popup, tap Printer Settings below the keypad.
In the Printer Selection section, tap Start Discovery to scan for discoverable printers or Manually Connect via IP Address to search for a printer manually:
If you tap Start Discovery: Tap your printer name in the Printer Discovery page to set it as the default printer.
If you tap Manually Connect via IP Address: Enter the IP address, then tap Search. If your printer appears in the Found Printer section, tap it to set it as the default printer.
Once you've selected your printer as the default printer, your changes are automatically saved and you'll be taken back to the Settings page.
Tip
If you're having trouble connecting your printer to the mobile app, you can open the troubleshooting wizard by tapping Troubleshoot on the printer settings page.
Troubleshooting
First, make sure the word "Zebra" is in your printer name in your computer's printer settings. If it is, the next step is to check that all your apps are up to date! After installing any updated versions, restart your computer.
If your issue isn't listed here, chat with other people in our Circle or Facebook communities. You can also contact support using the ? in the toolbar in Planning Center.
Here are the current latest versions:
Make sure the most current version of the Check-Ins app and printing is downloaded. (Download both here)
Java: Adoptium [Eclipse Temurin v 17+] (Download here)
Tip
Adoptium v17 will only work if you have also updated Check-Ins Printing app to v2.2.4+4
If your versions are up to date, try the following options:
Make sure only one printer is installed and it's set to be your default printer.
Make sure the physical connection to your computer is sound by unplugging the printer power cord for a full 10 seconds, then plugging it back in.
Use the desktop app instead of using a browser.
Restart your device.
If those steps still don't allow you to print, contact Planning Center Support.