Split registrations
For some events, you'll want attendees to specify multiple dates and times for each selection type they register for. Choosing Simple Count during the signup creation process will allow you to enable split registrations. This lets attendees choose more than one date and time for each selection type.
First, add all the dates and times for your event.
Select the Signups page in the top navigation.
Choose your signup from the list.
Select the Configuration tab of your signup.
Choose About on the left.
Select Edit in the Dates and times box.
Select Add date/time.
Enter a start date and time, and an end date and time.
Repeat for each date and time.
Select Save to update your signup.
After you've added all dates and times, enable split registrations.
Select the Configuration tab of your signup.
Choose Selection types on the left.
Select Options in the top-right corner.
Select Manage.
Check the box to Enable split registrations.
Check the box next to each date and time you want to allow attendees to register for.
Select Save.
Important
Split registrations cannot be enabled after people have already registered.
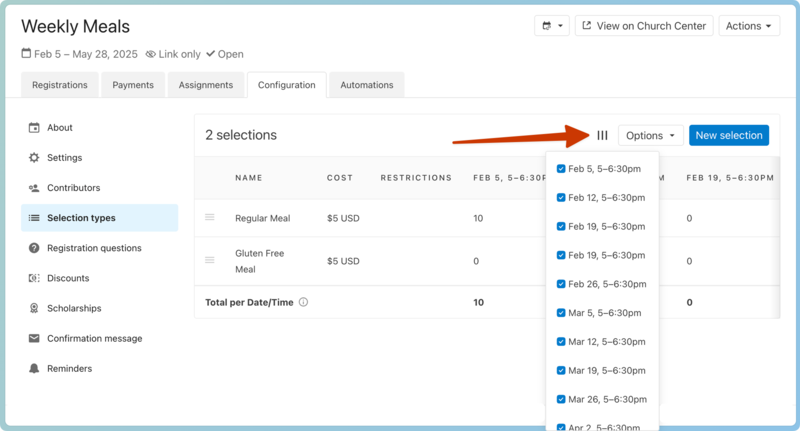
When viewing the Selections type page with split registrations enabled, each available date or time will be added as a column. You can see how many of each selection type are taken for that date or time.
Select the columns button to remove dates or times from the administrator view. This does not hide the unselected dates/times from the published Church Center page.
When the event is published, the Selections section of the registration process will include each date and/or time you selected. Attendees can choose between the dates and times when they register on Church Center.

Tip
The capacity for a selection applies to each occurrence of the selection.