Manage group locations
Add a location so members know where the group is meeting. You can create physical or virtual locations for your groups and share them with other groups.
Group locations are included in all event reminder emails and are available to group members on Church Center.
Create a location
You can create a physical location using an address or add a virtual location, such as a video conference URL.
Create a physical location
Select the Groups page from the top navigation in Groups.
Select a group from the list.
Select the Settings tab from the left sidebar.
Scroll down to the Location section.
Choose Physical address as the Type of location.
Select Create a new location... from the dropdown menu.
Enter a name for your new location.
(Optional) If other groups or events might need this location, check the box next to Share this location with other groups.
Enter an address, then make sure that the location on the map is correct.
Tip
To pin a more specific location instead of an address, select an area on the map.
Use the Non-Member Display dropdown to choose whether the public-facing address and location should be Hidden, Approximate, or Exact.
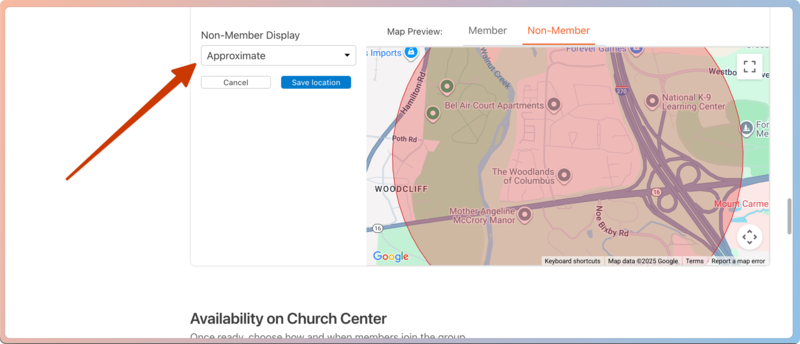
Select Save location to add the location to your group.
Create a virtual location
Select the Groups page from the top navigation in Groups.
Select a group from the list.
Select the Settings tab from the left sidebar.
Scroll down to the Location section.
Choose Virtual (link) as the Type of location.
Enter the meeting link for your chosen video conference platform, such as Zoom, Go-To-Meeting, and Google Hangouts.
Select Save to add the link as a virtual location.
Important
If you add a video conference link as your location, only logged-in group members can access it.
Change your group's location
If your group's location changes, you can either edit the existing one or delete the current location and replace it with a new one.
Edit a location
Select the Groups page from the top navigation in Groups.
Select a group from the list.
Select the Settings tab from the left sidebar.
Scroll down to the Location section.
Choose the location you'd like to edit from the dropdown.
Select Edit location in the bottom right of the location details.
Edit the Location Name, Address, and Non-Member Display setting.
Select Save location to apply your changes.
Delete a location
Warning
You cannot recover a location once it's been deleted.
Select the Groups page from the top navigation in Groups.
Select a group from the list.
Select the Settings tab from the left sidebar.
Scroll down to the Location section.
Choose the location you'd like to edit from the dropdown.
Select Delete location in the bottom right of the location details.
Select Yes, delete [location name] in the confirmation popup to permanently delete this location.
Choose a new location
Select the Groups page from the top navigation in Groups.
Select a group from the list.
Select the Settings tab from the left sidebar.
Scroll down to the Location section.
Choose an existing location from the dropdown.