Use event tabs during an event
During an event, editors can make changes to check-ins, such as updating their type, removing duplicates, and adding more check-ins, to ensure the data is clean.
As an editor, you have access to the Overview and Check-Ins tabs of the event. This tab reflects the actual check-ins associated with the event.
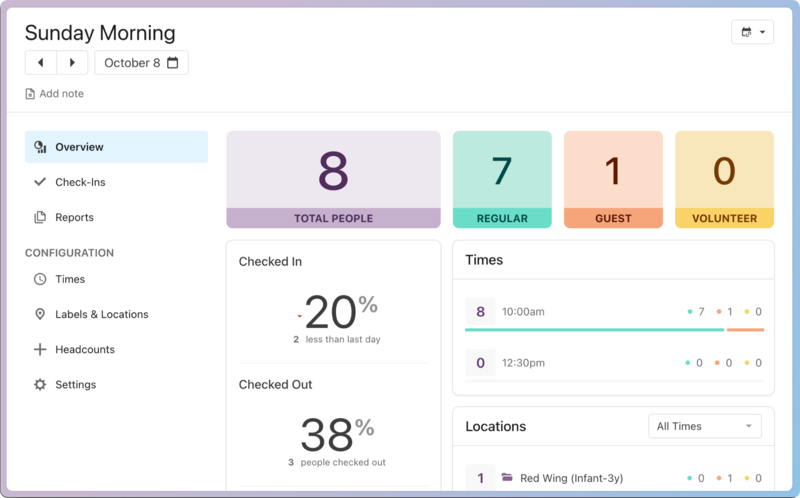
The Overview tab shows you how many people are checked in, and it breaks that number down by location and even type.
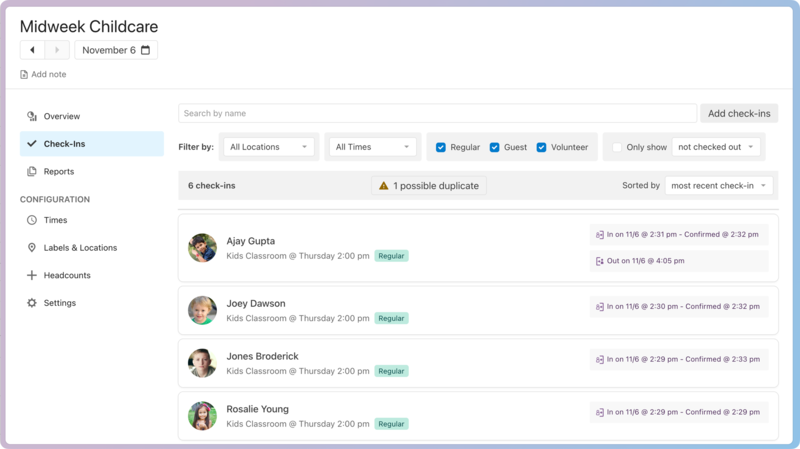
The Check-Ins tab shows you the total number of check-ins and allows you to filter and sort to find those who have checked in. If the main numbers don't match, it could be because a person was checked in multiple times.
Check out the table below for a comparison of how this looks on a web browser versus on a station.
On a web browser | Station |
|---|---|
Overview tab shows the number of volunteers, people checked into locations, etc. | A roster station shows classroom leaders who and how many people are checked into a location |
Check-Ins tab shows what time a person's check-in was confirmed on a roster station. | A roster station shows a list of confirmed and unconfirmed people on the Here tab (no timestamps). |
Can check in people when event is over | Can print labels |
Does not show households | Cannot change a person's location once checked in |
Add check ins
The best way to add check-ins is from a station. However, you can manually add check-ins on a web browser by searching for a name at the top of the Check-Ins tab and selecting Add check-ins.
Filter and sort
In order to keep your session information accurate, you may need to sort the list to remove duplicates or move people from one location to another.
Filter by location or time
Use the All Locations and All Times dropdowns to filter and verify that those listed in that location are correct.
Filter by type
Select and deselect the Regular, Guest, and Volunteer checkboxes to filter the list to show only the types you need to see.
Tip
If a self station shows an alert about not enough volunteers, your volunteers might be checked in as the wrong type. From the Check-Ins tab, filter the page to the location and find those who checked in with the wrong type.
If the volunteer is checked in as a Regular, you can update their check-in to Volunteer.
If the volunteer is checked in to a different location, you can update their check-in to the correct location.
Sort check ins
If you want to remove duplicates, change the sorting view to first or last name using the Sorted by dropdown in the top right.
This view allows you to see those who have been checked in twice.
Update an individual check-in
If someone is checked in to the wrong location or type, you can update their information without having to check them in again. In addition, if you want to delete a check-in because it's the wrong person or a duplicate, you can do that from the individual check-in.
Select the Events page from the top navigation.
Select the event from the left sidebar.
Select the Check-Ins tab from the left sidebar on the event's page.
Select the name of the person you'd like to update to open their check-in page.
Wrong location or type
From the individual's check-in page, update the location or type using the options in the Times & Location section.
If you need to reprint a label, you must do so from a station once you've changed its location or type.
Delete check-in
Scroll to the bottom of the individual's check-in page and select Delete Check-In.
Warning
A deleted check-in cannot be restored. If you need to add this person's attendance back into the session, you'll need to check them in again.